Opportunity Clone With Products is an innovative App by CloudVandana, through which users can easily clone Opportunity with its related Products in the Lightning Experience. It is easy to configure and clone the records at the click of a button. It saves time and increases the productivity of the Sales Representatives.
Opportunity Clone With Products Highlights:
One-Click solution to Clone Opportunity with Products.
Add the “Clone Opportunity with Products” button to your Opportunity Layout to use the app.
You can also specify ‘Prefix’ and ‘Suffix’ values to your clone Opportunity name.
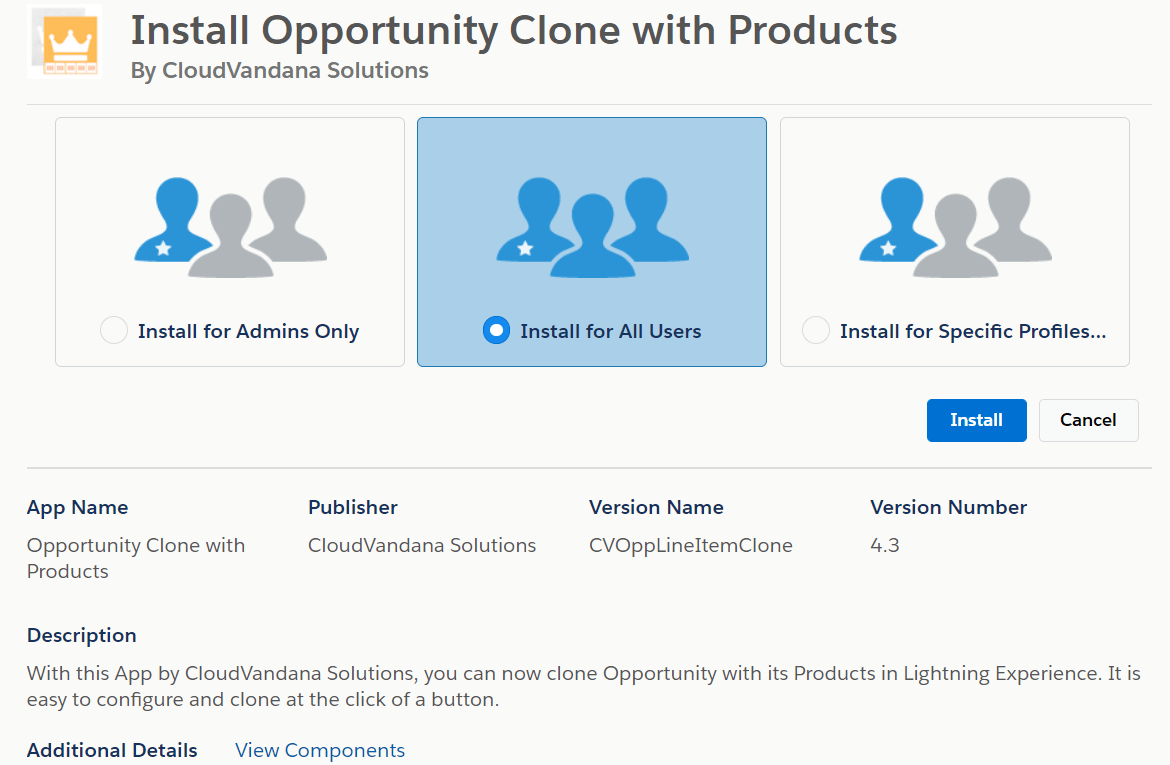
Installing “CV Opportunity Clone with Products” is easy – just click Get It Now from the AppExchange and follow the prompts to install in either Production/Sandbox (Professional Edition, Enterprise Edition, Unlimited Edition, or Performance Edition).
Please enter the login details of your salesforce administrator if you are presented with the login screen.
Once you are presented with the installation screen, you must select which of your users should be granted access to the app, including all its components.
Once you make your selection, click the Install button.
Once the installation is complete, click the Done button to return to your Salesforce org. You may see a message stating that the installation is taking a long time to complete. In this case, you will receive an email once the installation finishes.
Now CV Opportunity Clone with Products is Installed in your System.
You can verify the same in the installed packages. From Setup, Search Installed Package and Click “Installed Packages” to view
Configuration Steps
Enable My Domain – Pre-Requisite
My Domain is a Salesforce feature that lets you highlight your brand, makes your org more secure, and allows you to take advantage of some new features of Salesforce like Lightning Pages, the Lightning App Builder, and, what we are interested in most, Lightning Components.
The easiest way to see if you have My Domains enabled is to log into Salesforce and look at the address bar. If you see something like https://yourcompany.my.salesforce.com, then you are all set and can skip to the next step. However, if you see something like https://ap17.salesforce.com, you do not currently have My Domain enabled and need to take a few extra steps first.
Adding the “Clone Opportunity with Products” Button to the Page Layout
Opportunity With Products Button can copy records on Opportunity, but first, you have to put the “Clone Opportunity With Products” button on the Opportunity page layout(s).
To add the “Clone Opportunity with Products” button in Lightning Experience
Edit the page layout you want to add to the “Clone Opportunity With Products” button.
Check the Salesforce Mobile and Lightning Experience Actions section.
If it already shows a list of buttons, then continue to step 4.
If it contains a block of text with a link to override the predefined actions, convert it to a list of buttons by clicking that link:
It should now look something like this:
Select Mobile & Lightning Actions from the sidebar at the screen’s top and drag the “Clone Opportunity with Products” button to the Mobile and Lightning Experience Actions Section, and Click Save.
CV Twitter feed is an effective app introduced by CloudVandana. Wonder what your Accounts, prospects, and contacts are tweeting about?
Do you want to keep yourself updated about the Tweets of your contacts, prospects, or accounts you are dealing with? Do you find it tedious to open Twitter in a separate Tab and search for each profile?
CV App Store is here to solve all your questions with the new CV Twitter Feed app. It is easy to configure and designed natively on Salesforce. You can get Twitter feeds of your Contacts, Leads, and Accounts on the Salesforce page without switching tabs, and you don’t need to go anywhere for that.
Just enter the Twitter handle on the page, and you are good to go. Sounds easy, isn’t it?
We recommend installing the app in the sandbox first and then install in production if everything looks fine.
Please enter the login details of your Salesforce Administrator User if you are presented with the login screen.
Once you are presented with the installation screen, you must select which of your users should be granted access to the CV Twitter Feed app, including all its components.
Most customers should select the middle option “Install for All Users”, which will ensure that all users have the proper permissions should they be assigned a license in the next step.
Click the Checkbox as shown to Acknowledge your installation.
Once you make your selection, click the Install button.
Once the installation is complete, click the Done button to return to your Salesforce org. You may see a message stating that the installation is taking a long time to complete. In this case, you will receive an email once the installation finishes.
Now CV Twitter Feed is Installed in your System.
You can verify the same in the installed packages. From Setup, Search Installed Package and Click “Installed Packages” to view.
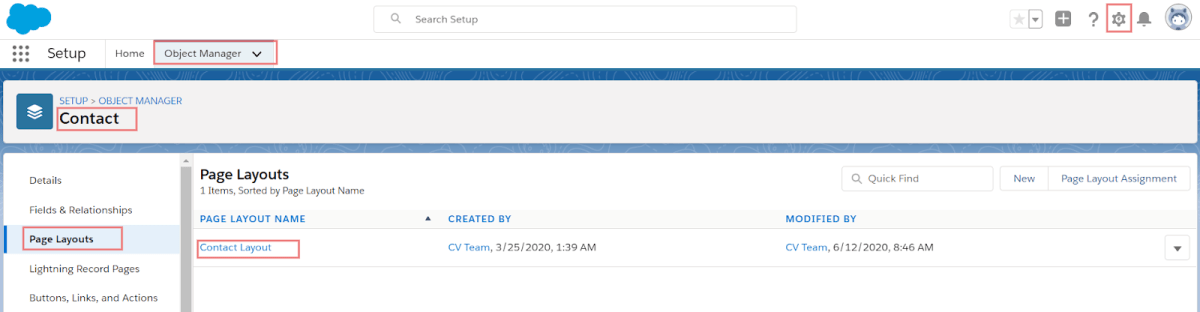
Enter Contact in Quick find search and Click on Contact.
Click on Contact Page Layouts from the left panel and click on Contact layout to Edit.
Drag Twitter handle field from the Fields section on the Top and drop to the page layout as desired.
Click Save.
Please follow these steps(1-5) again to add the Twitter Handle field on your Accounts and Leads page layout.
Add CV Twitter Feed Interface to Record Page
You can add a twitter feed component on the Account,Contact and Lead record pages. Twitter Handle field must have a valid public twitter profile handle in order to get the feed in the component.
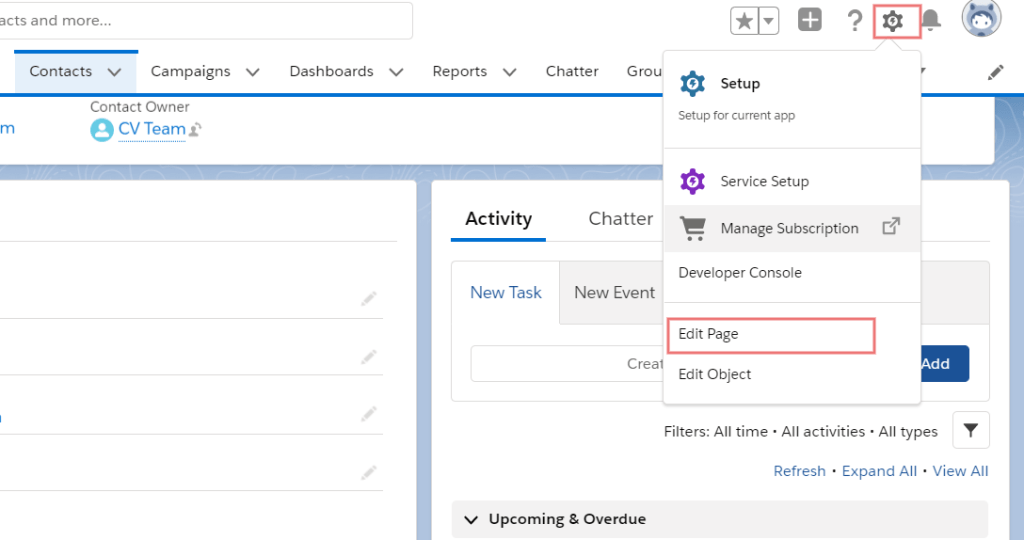
From the Contact record detail page, click the gear icon at the top right corner, select Edit Page to open the Lightning App Builder.
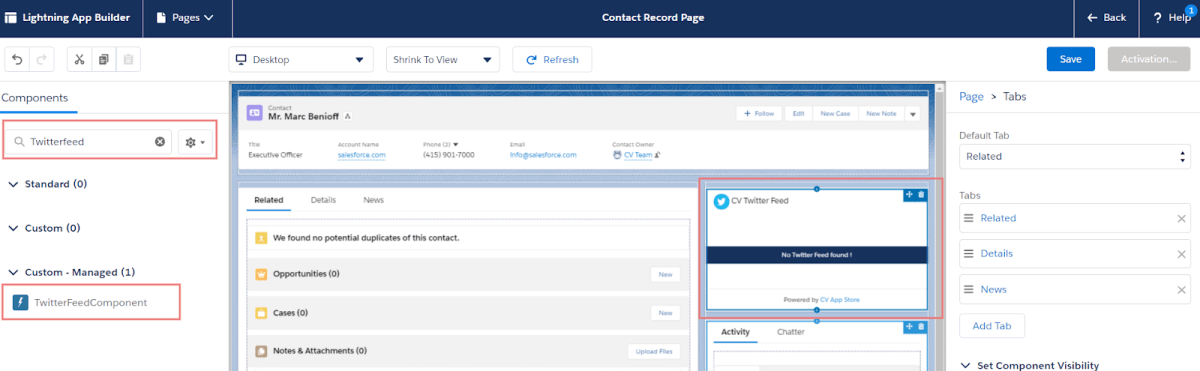
Enter twitter feed on the search component from the left.
Drag and Drop the Twitter feed component on your page layout at the desired section.
Click Save, and then click Activate to Activate the record page.
You have a few options for activating a record page.
Make the page the org default for the object.
Make the page the default object record page for specific Lightning apps.
Assign the page to a combination of Lightning apps, record types, and profiles.
Assign the page to a form factor, such as a desktop or phone.
On the activation screen, click the tab for the option you have chosen, and follow the steps to activate the page.
Once you have set up the twitter feed component and twitter handle field on your Contact, Lead and Account record page then you are ready to use this app.
Open any contact record and edit to enter the twitter handle field
Enter twitter handle of your contact with or without “@” prefix
e.g. It could be @benioff , salesforce , @atulgupta31 etc.
OR
You can update the twitter handle anytime in case you feel you have the wrong twitter handle of your contact and want to update. In case the application did not find any twitter handle it will show “No Twitter Feed found” OR “Please Enter a valid Twitter Handle !” message.
Note : This app will work only for Public profile. You cannot access the twitter feed of any private profile. We appreciate the privacy of an individual.
Are you looking for a reputed Salesforce partner to take care of your Salesforce projects? Please feel free to schedule a call with CloudVandana and avail Salesforce Staff Augmentation service to stay one step ahead of your competitors. Call us now.
CV Exception Framework is a Salesforce Exception Handler Framework designed by CloudVandna Solutions. This exception handling framework will give a detailed description of the exception that occurred, including the Line Numbers, Exception Messages in an easy-to-read format. It will help Apex developers to log catch exceptions in a custom object. This app will help Apex developers to log catch exceptions in a custom object and not just in debug logs which are relevant only for 24 hours.
Once the app is installed, developers can use this framework in any apex class, be it a controller, batch class, scheduler class, or trigger handler, to capture detailed exception messages neatly logged into a custom object. This provides a very easy and proactive way of capturing exceptions in PRODUCTION. The development team can monitor exceptions and take action before the end-users report them.
Please go to the above link to install the CV Exception Framework app in Production OR Sandbox Salesforce Org.
Select your environment sandbox or production and click on the installation link to install the app in the selected environment.
We recommend installing the app in the sandbox first and then install in production if everything looks fine.
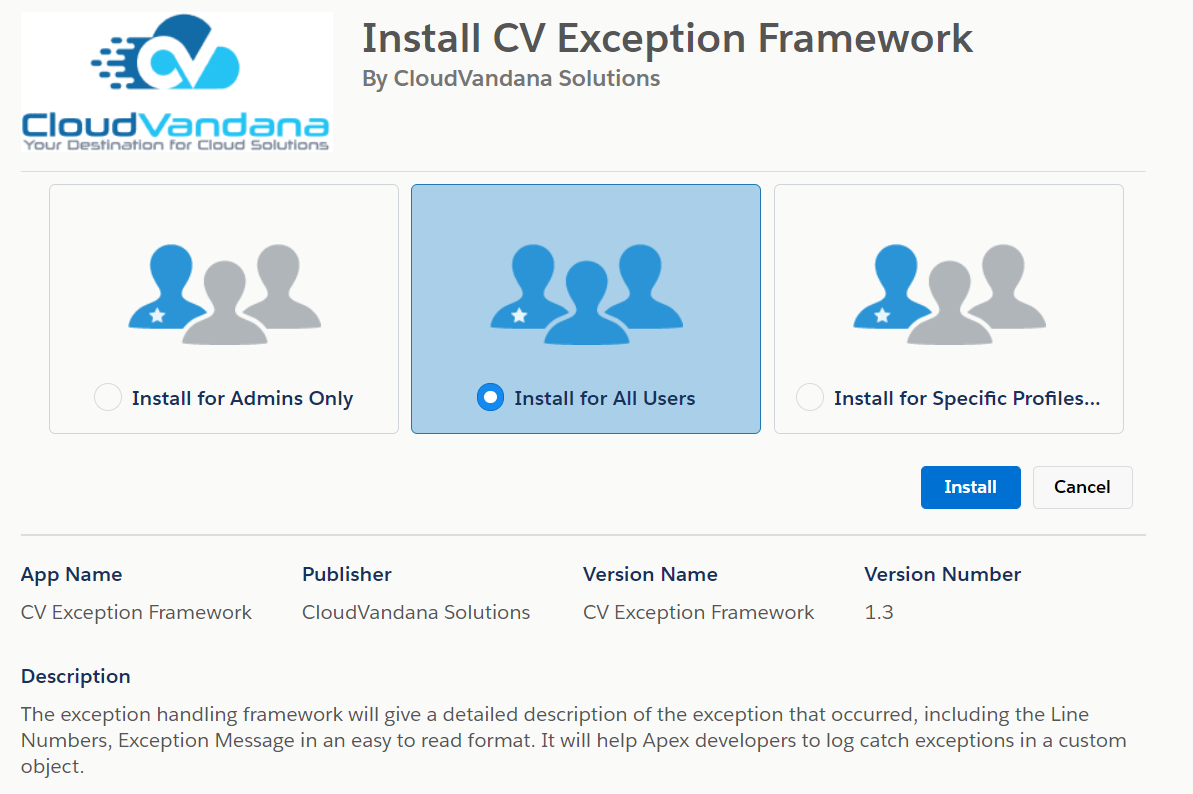
Once you are presented with the installation screen, you must select which of your users should be granted access to the CV Exception Framework app, including all its components.
Click the Checkbox as shown to Acknowledge your installation.
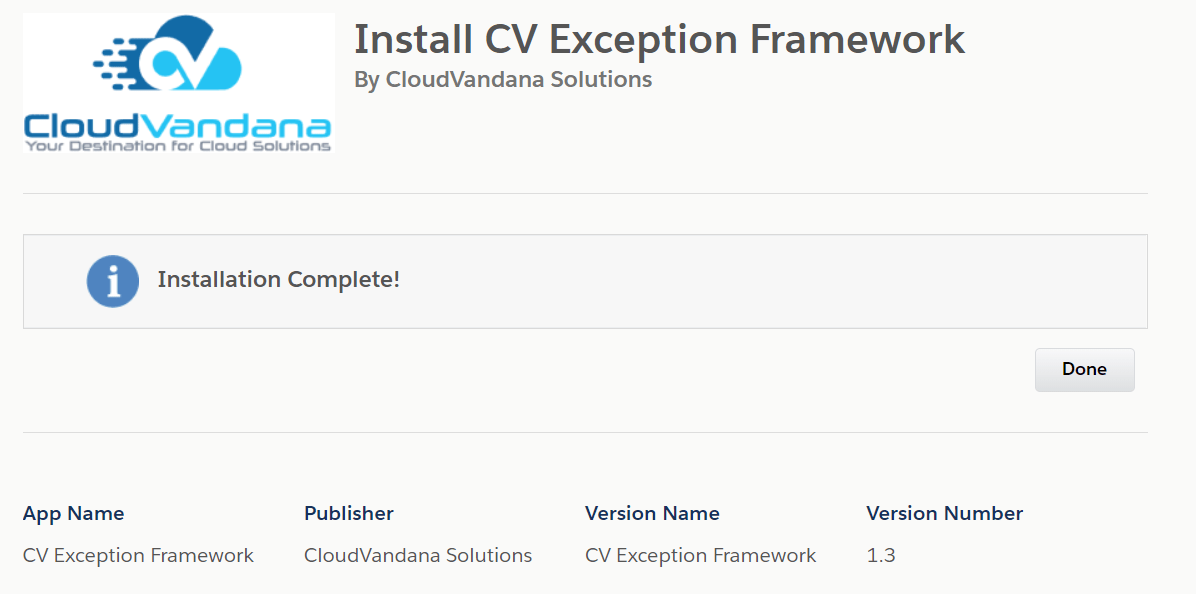
Once the installation is complete, click the Done button to return to your Salesforce org. You may see a message stating that the installation takes a long time to complete. In this case, you will receive an email once the installation finishes.
Now CV Exception Framework is Installed in your System.
You can verify the same in the installed packages. From Setup, Search Installed Package, and Click “Installed Packages” to view.
Now, let’s discuss how to use the CV Exception Framework:
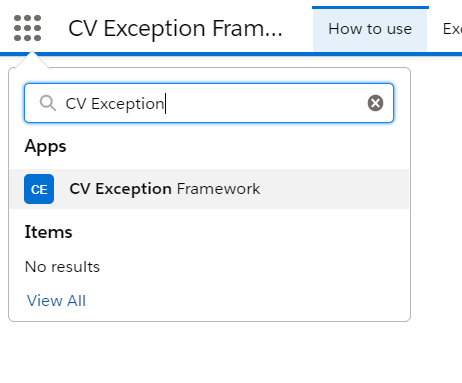
From the App launcher, search for CV Exception and Click CV Exception Framework to open the app.
You can navigate to the How to Use tab to review the instructions.
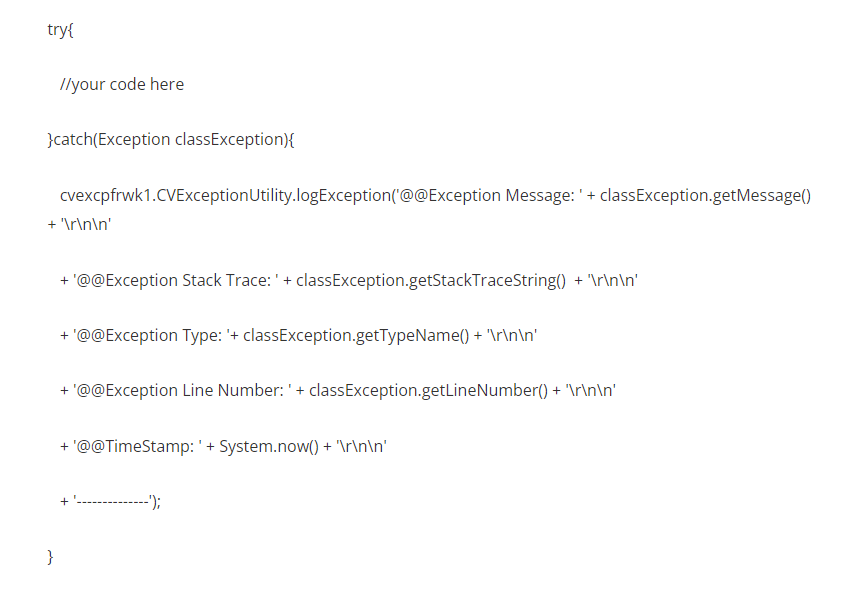
Now, You have to use the try-catch block of code to catch any exception in the custom object that comes with the app.
You can use this code
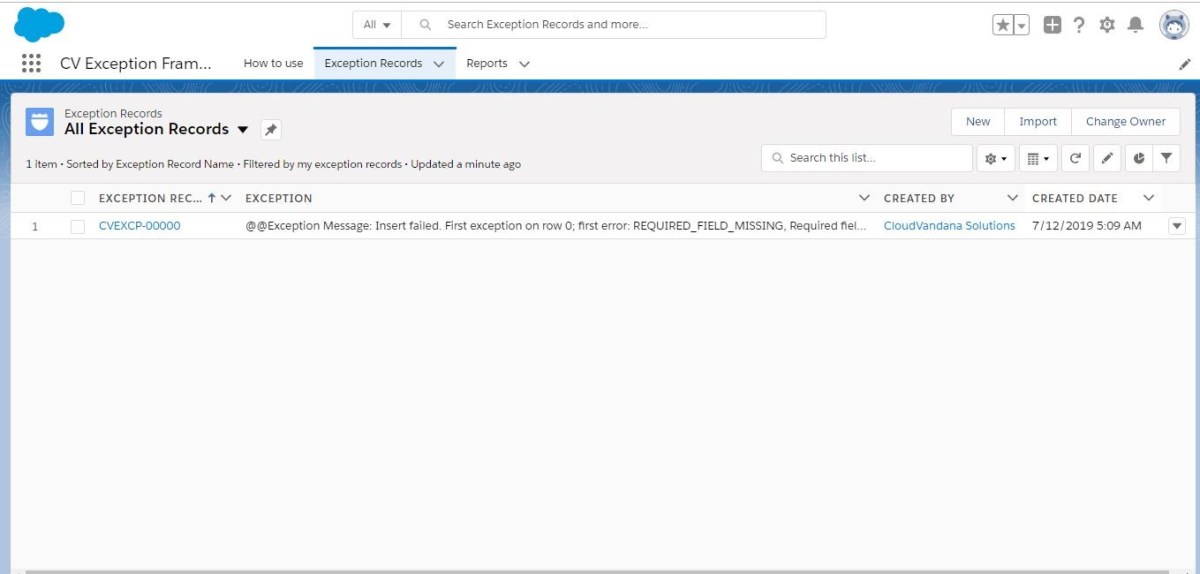
Access the Exception Records
Click on the Exception Records tab from the CV Exception Framework app to view the records captured as an exception.
You can click on the record to view the exception in an easy-to-read format. You don’t need to create the debug logs manually to debug the error. You can access these records anytime and delete the records if no longer required.
We also provide an out-of-the-box report to access these exception records to get an overview of exceptions captured within the organization.
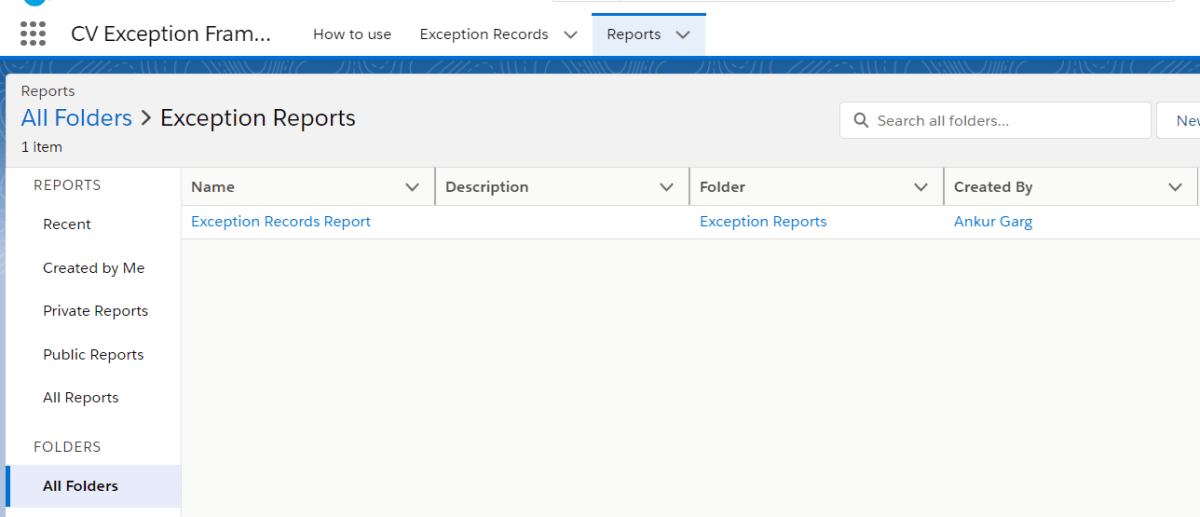
Access the Exception Report
From the “CV Exception Framework” App. Click on the Reports Tab.
Then Click on All Folder and Navigate to Exception Reports Folder.
On Clicking on the folder, you can access the Exception Records Report.
Click on the report to view the exception records in a nice tabular format.
So this was a quick overview of this framework. Please visit our AppStore apps for more innovative solutions.
Are you looking for a Salesforce partner for a successful Salesforce integration and maintenance process? Please schedule a call with the Salesforce experts of CloudVandana today, and get the best solution for your organization to stay ahead of your competitors.
Salesforce opportunity stages describe the high-level phases within the sales process. The opportunity tab in Salesforce captures potential and ongoing deals currently pursued by the sales team in the organization. The Opportunities tab provides holistic progress of each value being followed and helps manage team effort spent per deal. No two sales team members approach the same client for the same opportunity, thus increasing the sales team’s efficiency.
Further, since opportunities are tracked on a real-time basis thus each opportunity’s progress is as accurate as it can get, and management can view each opportunity’s progress with accuracy. Every deal undergoes various sales stages as per the organization’s sales process before it is closed; these stages are termed “Opportunity Stages” in Salesforce. It is highly recommended that each business defines and customizes the sales process as per the firm’s business requirements, as shown below.
Steps to customize your own sales process
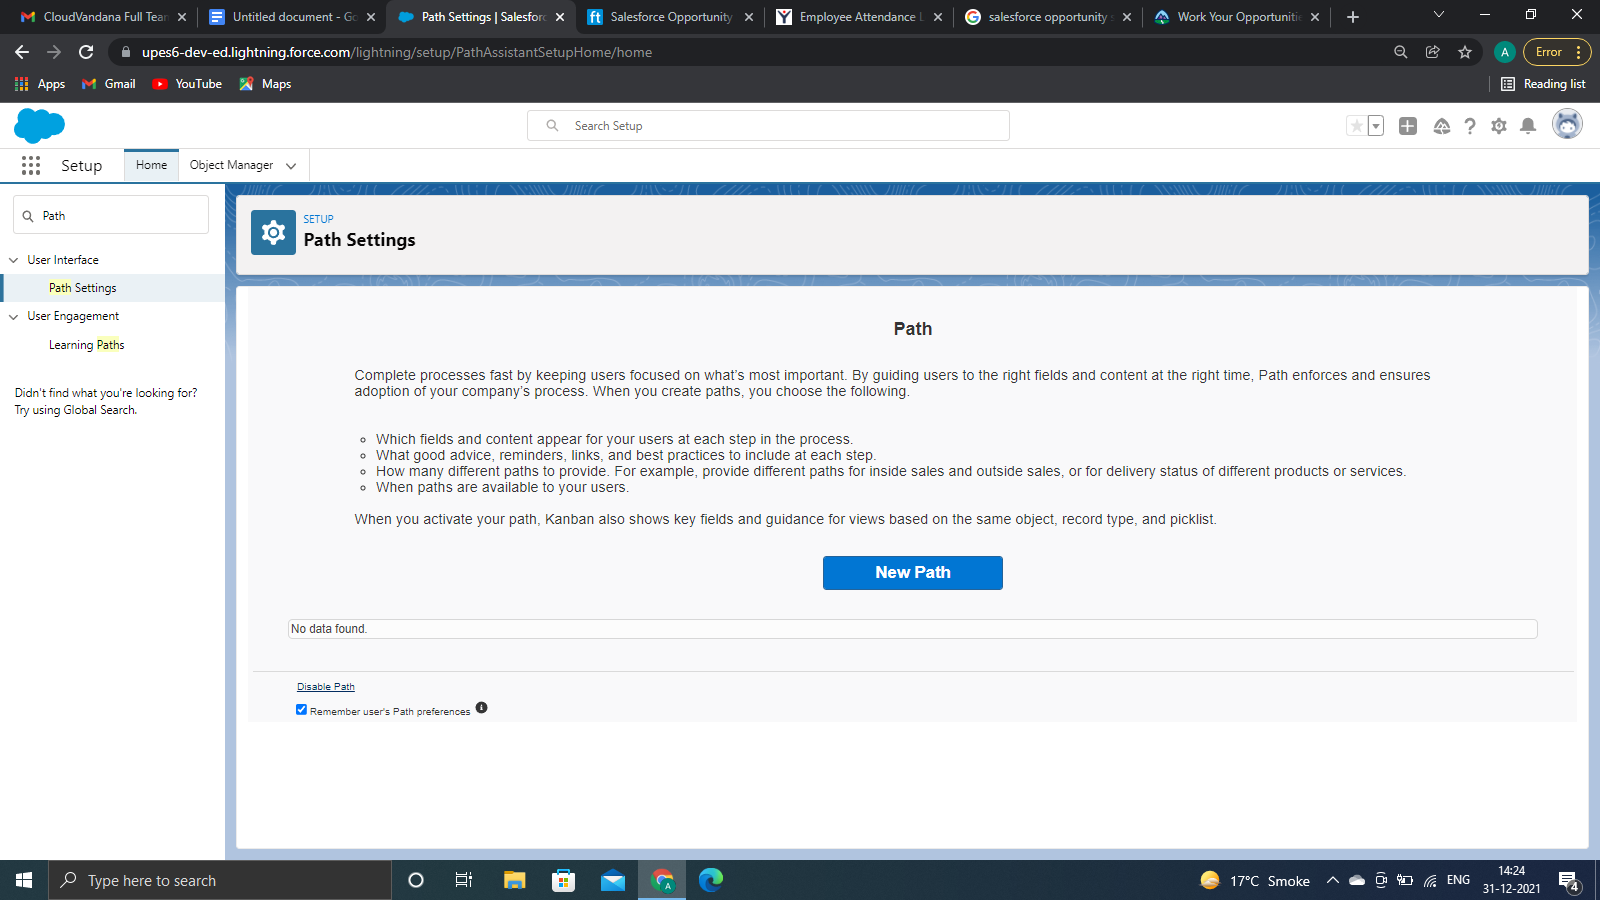
Step 1: Go to Setup, search for path settings, and enable “New Path.”
Step 2: Select “New Path.”
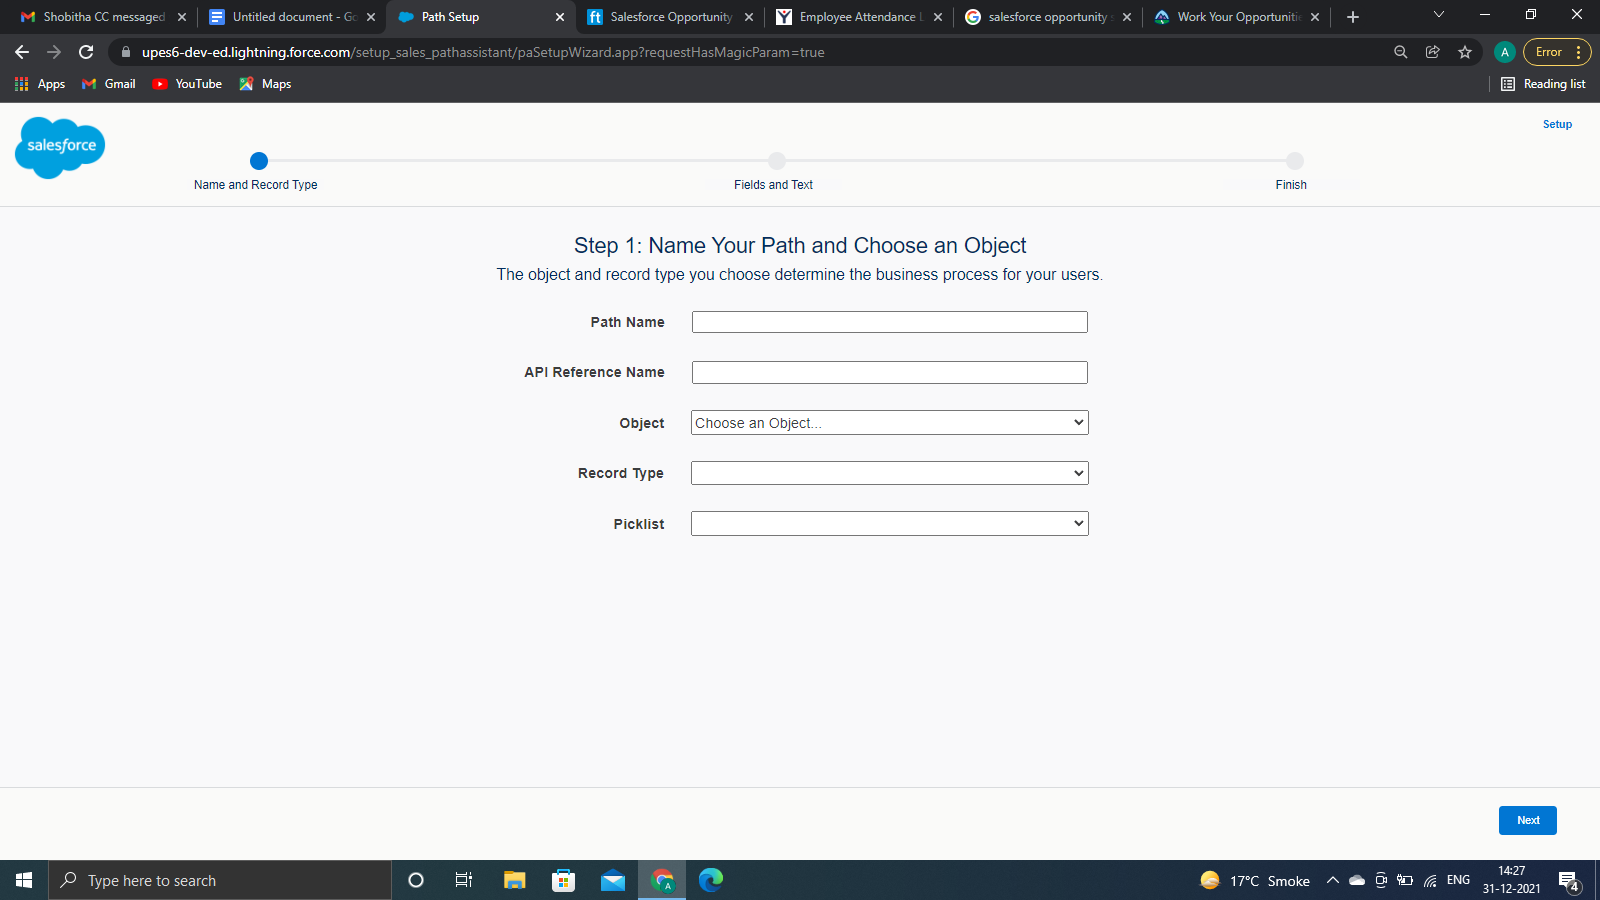
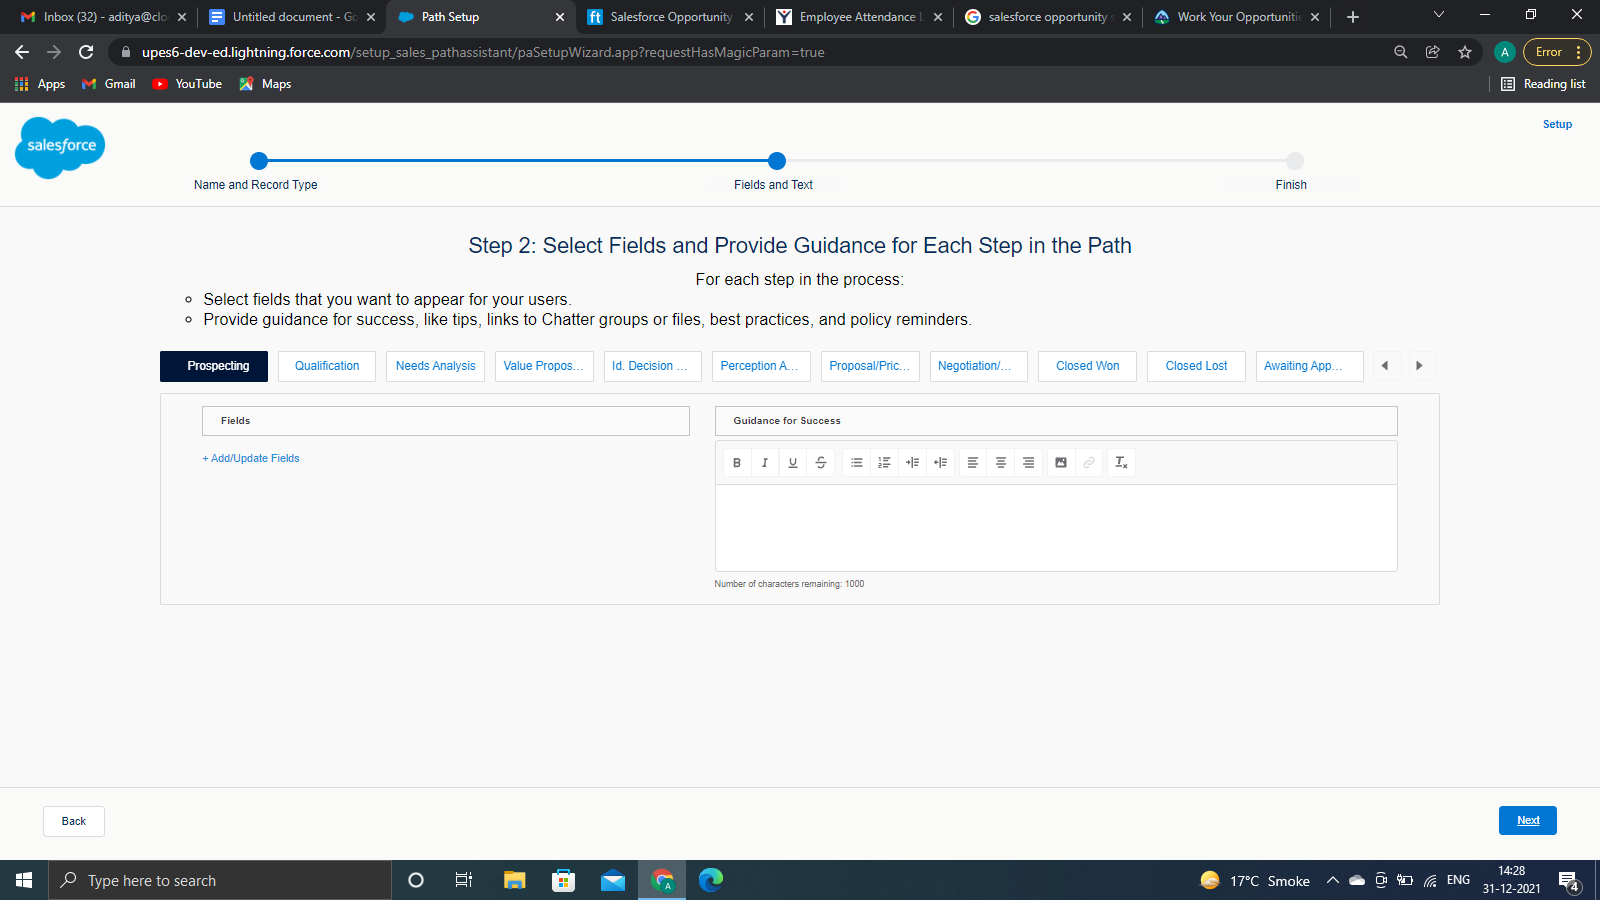
Step 3: List the Path Name and API Reference Name and select “Object Name.” Then, select the “Record Type” and the “Picklist Field” for which you want to customize a new path. Lastly, click on “Next.”
Step 4: Customize the “Positions” and “Stages” as per your business requirements.
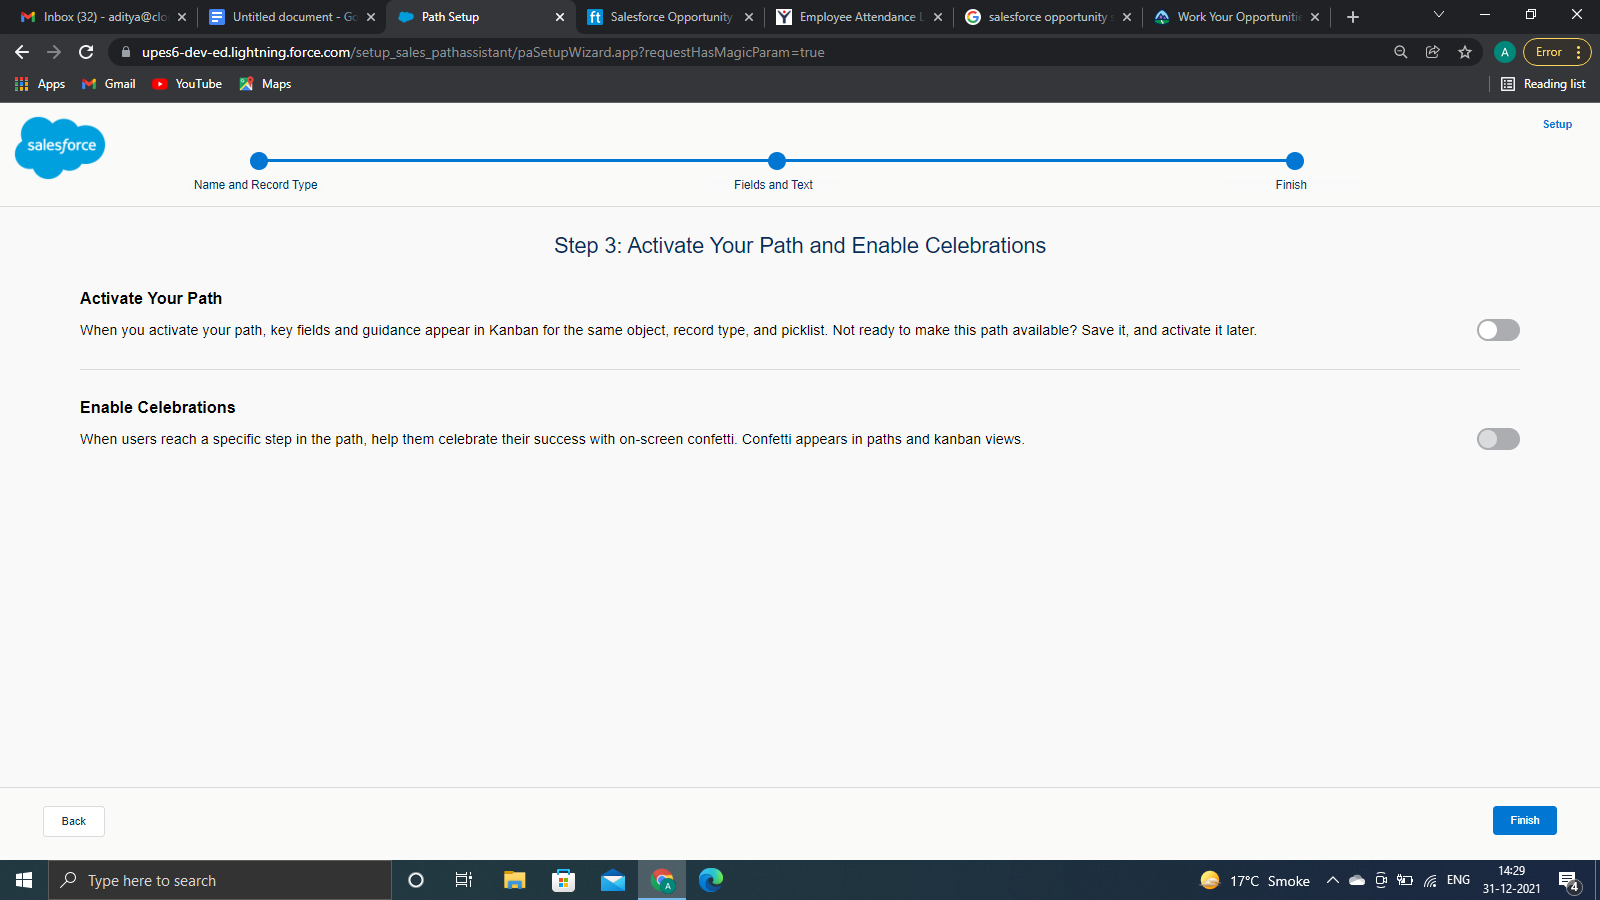
Step 5: Activate your path and click on “Finish”
Step 6: You can see the created path from the path settings
Conclusion
A firm can increase its sales process productivity through Salesforce functionalities by automating various sales stages while pursuing an opportunity.
Are you looking for a registered Salesforce partner to get the full benefits of Salesforce CRM? Please feel free to contact CloudVandana and take your organization to the next level.
Validation Rule in Salesforce helps implement standardization of data captured in the data fields as per the business’s requirement; thereby improving the data input quality of the saved records. This rule is best explained via an example as follows: Business Requirement is to capture the date of birth in the following format DD/MM/YY; however, if the validation rule is not applied then the user can input data in MM/DD/YY or in YY/MM/DD format. With the application of the Validation Rule, the user will receive an error message while trying to save the data in any other format apart from the format required by the business. This rule can be implemented to standardize data for every object present in Salesforce.
What is a Validation Rule made of?
The validation rule consists of the below-mentioned elements:
1. Object: Fields where the data is stored and where the validation rule will perform its field checks to standardize the data as per the business requirement.
2. Formula: A formula is evaluated for the specific business requirement that is to be met. If the formula evaluates to true then an error message is thrown or else it gets saved in the database.
3. Error Message & Error Location: The error message gets displayed on whichever data field does not meet the business requirement.
Following are the steps to implement a rule for a certain object:
Step 1: Go to Setup -Enter Object Manager in a quick box -Select Account (Any Object which you want to make validation).
Step 2: Select the validation rule from the left sidebar.
Step 3: Click on “New”.
Step 4: Enter a name for the rule.
Step 5: The Error Condition Formula section defines the business criteria to validate the data. To check the formula or expression for error click on Check Syntax.
Step 6: In the Error, message section defines the error message and the position of the error message, which will appear when the user enters the wrong data.
Step 7: Click on “Save”.
Let’s take an Example
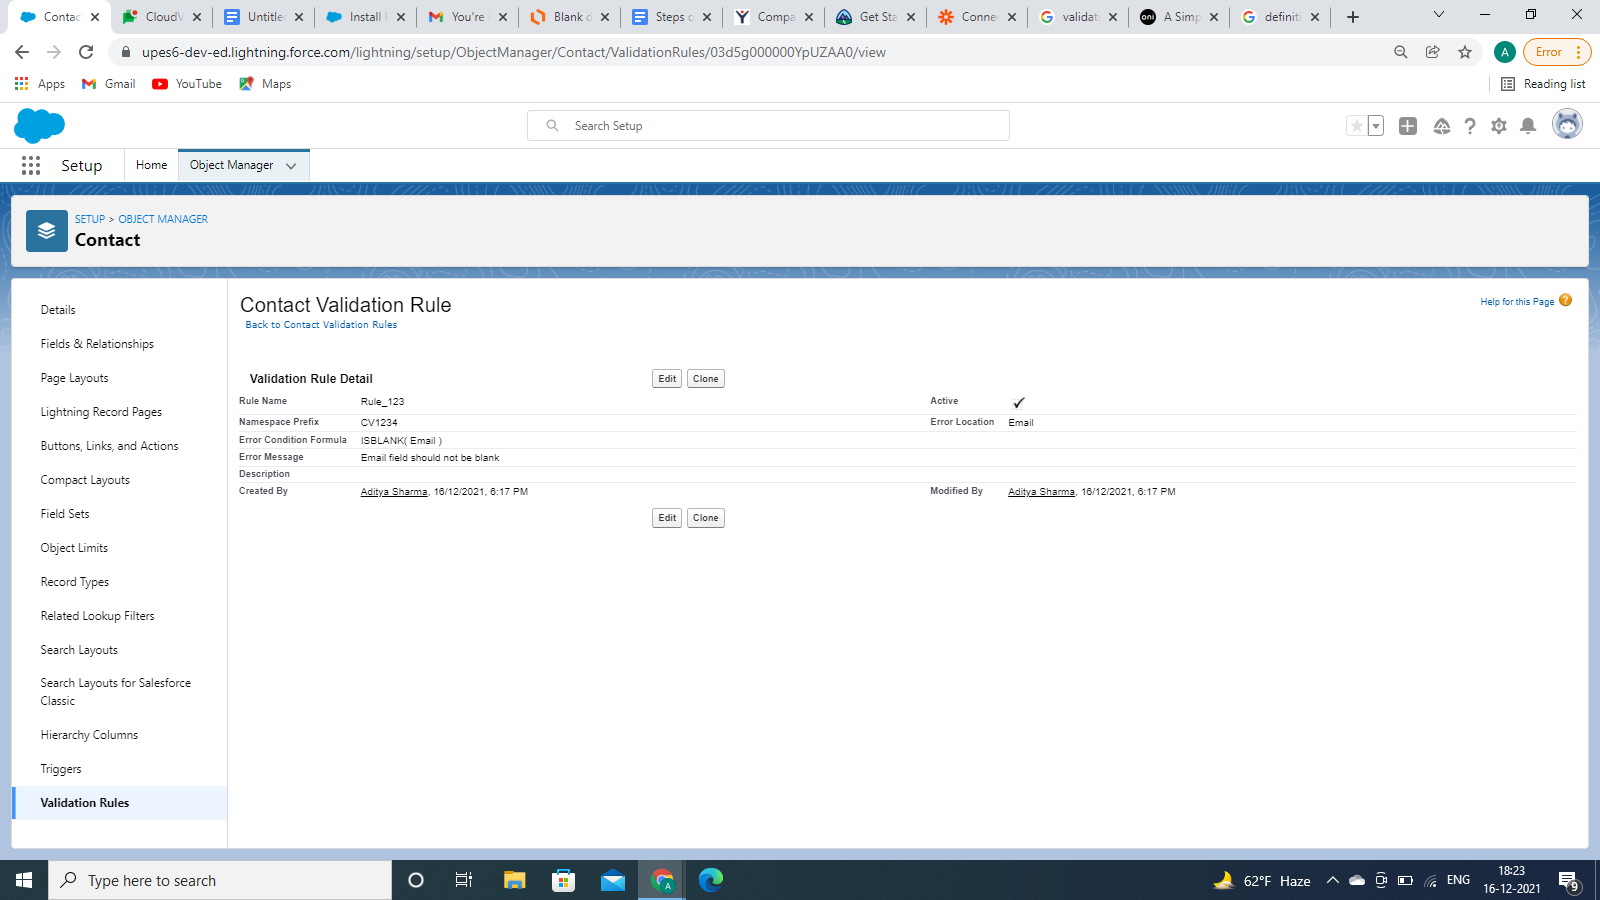
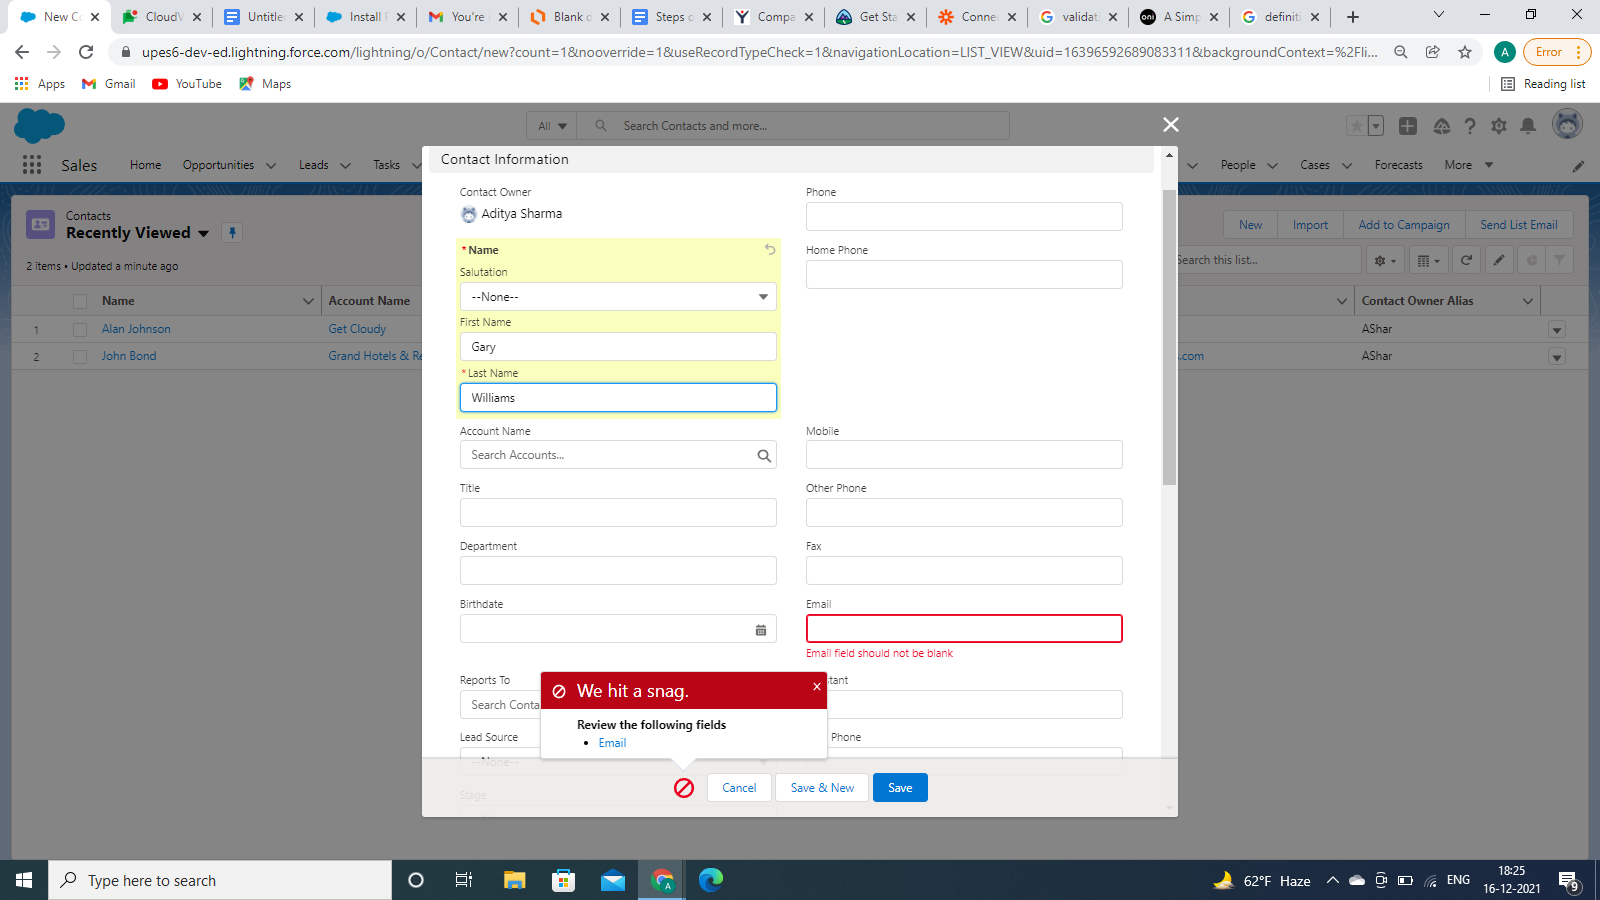
Case: The email field should not be blank in the contact record as shown below:
Are you looking for a customized Salesforce solution for your business? Please feel free to contact CloudVandana and get the full ROI of your Salesforce investment.