
As we know that permission sets in Salesforce are collections of permissions and settings that give access to the users to have additional access, which they have already got from their profile. There is also an option for multiple permissions as we can apply multiple permissions sets to multiple users, but only one profile can have one user. As you can see, there are some standard and custom permissions sets in Salesforce. In your org, there are already standard permissions sets, and custom permissions sets are created by the administrator or any user according to permissions available in your org editions.
How to Create Permission Sets In Salesforce
Step 1: Go to the setup, and in the quick find box, search permission sets. You can see there are some standard permission sets present in your org.
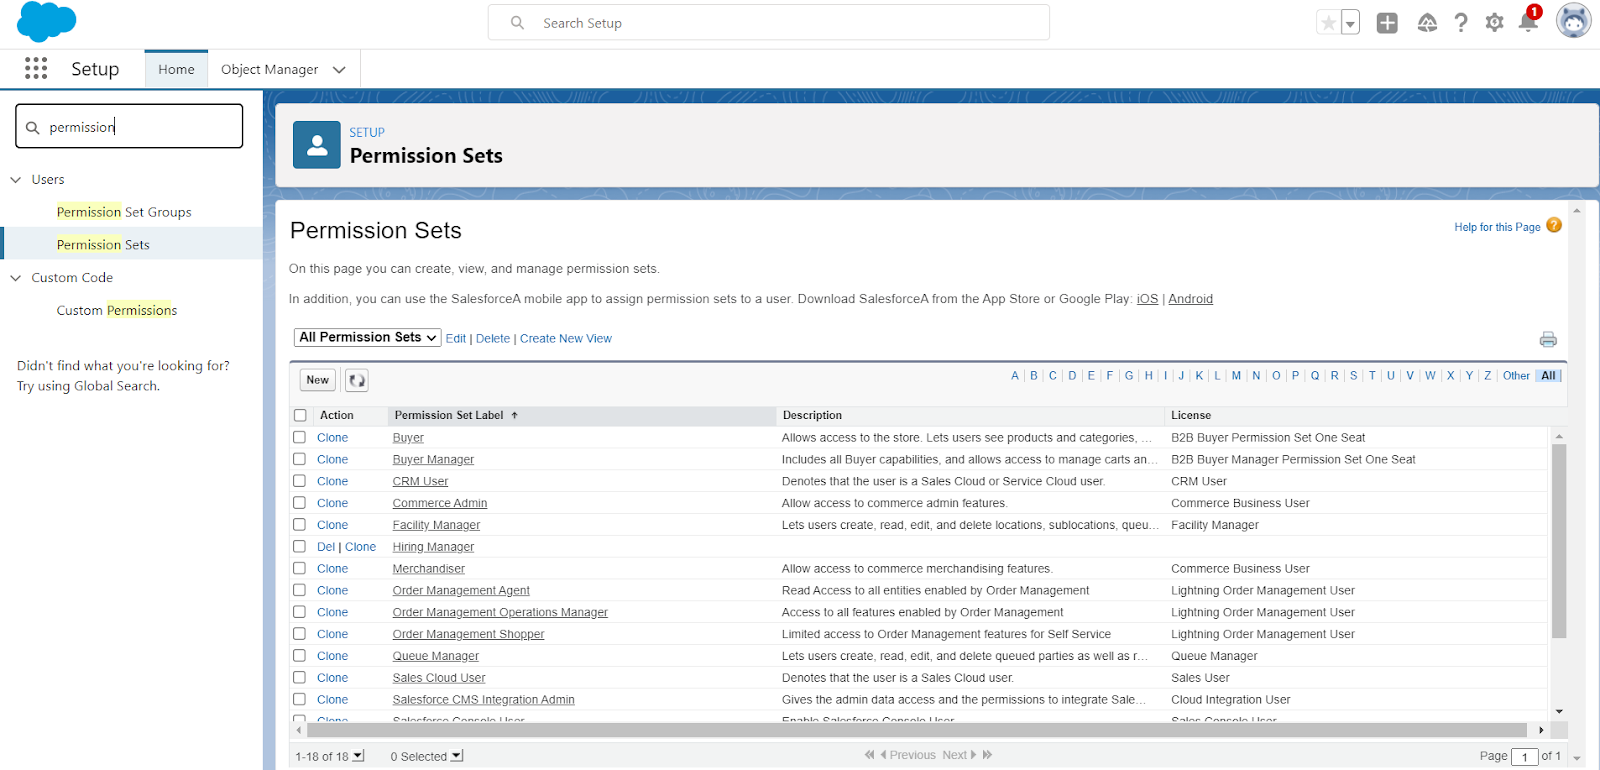
Step 2: Now Click on the “New” Button present just above the standard permission sets list.
Step 3: Then Fill in the following information
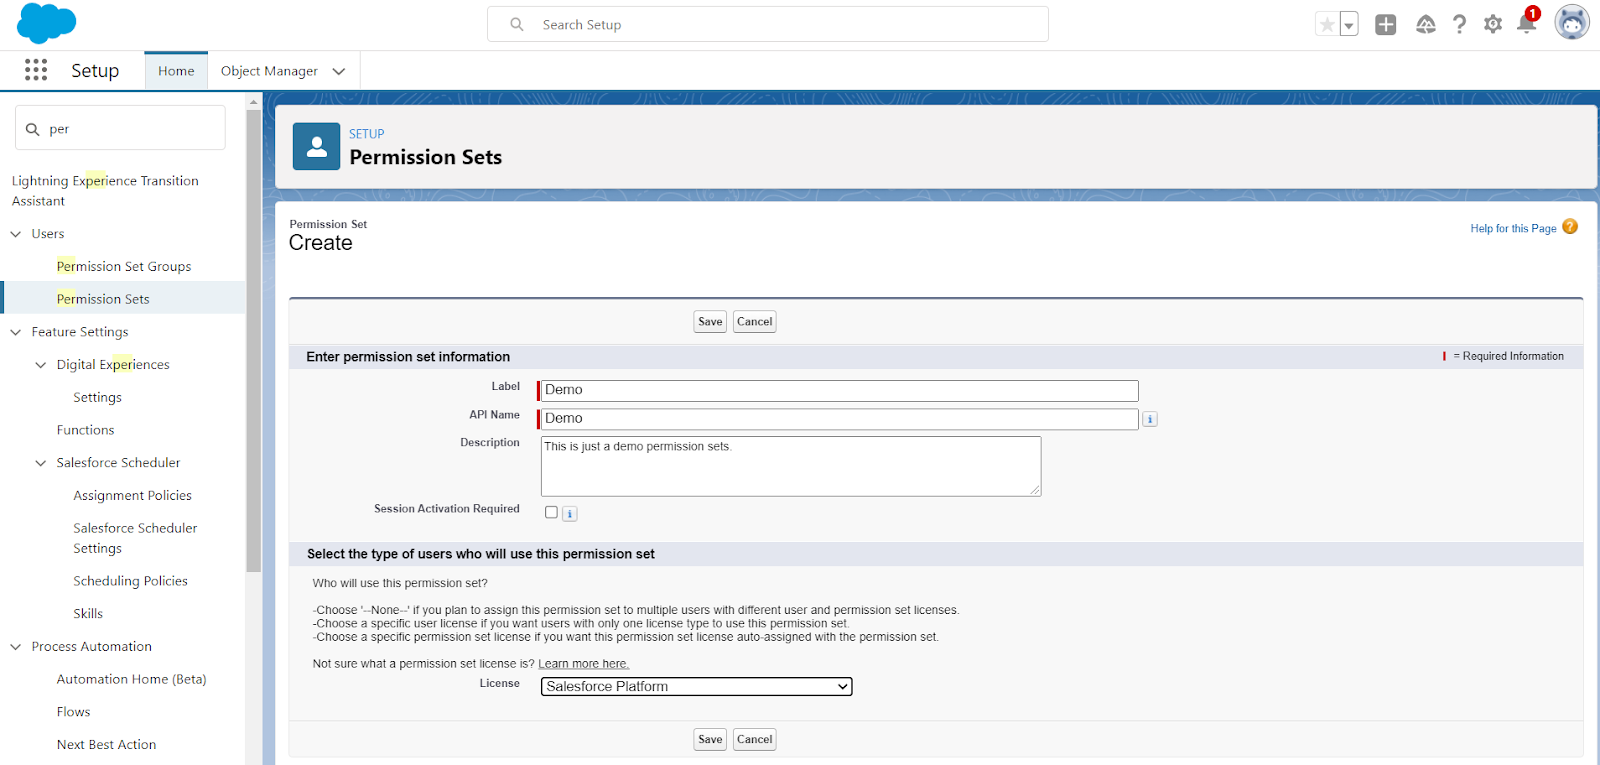
This means that here you choose the “Salesforce Platform” License, so you can assign this permission set to only those users who have the “Salesforce Platform” License.
Step 4: Then click on the ‘Save’ Button. Hence your permission set is now created, and you can manage permissions on this permission set and will assign this permission set to the user.
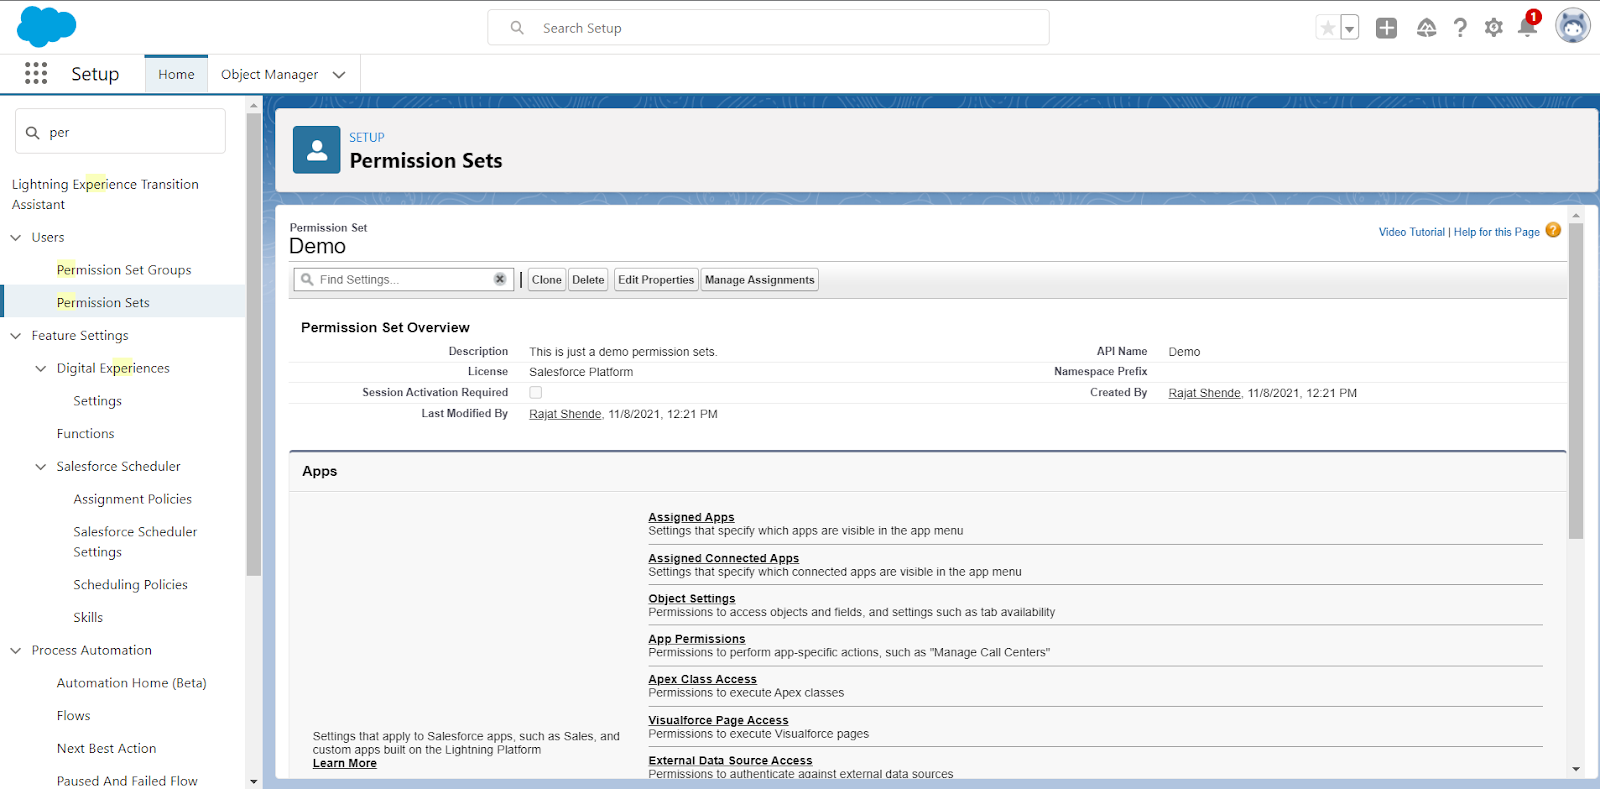
Managing Permissions on Permission Set
- The permissions available for the permission set are the same as the profile’s permissions other than Password policies, Login IP ranges, and Login hours. We can also manage the following permissions in the permission set.
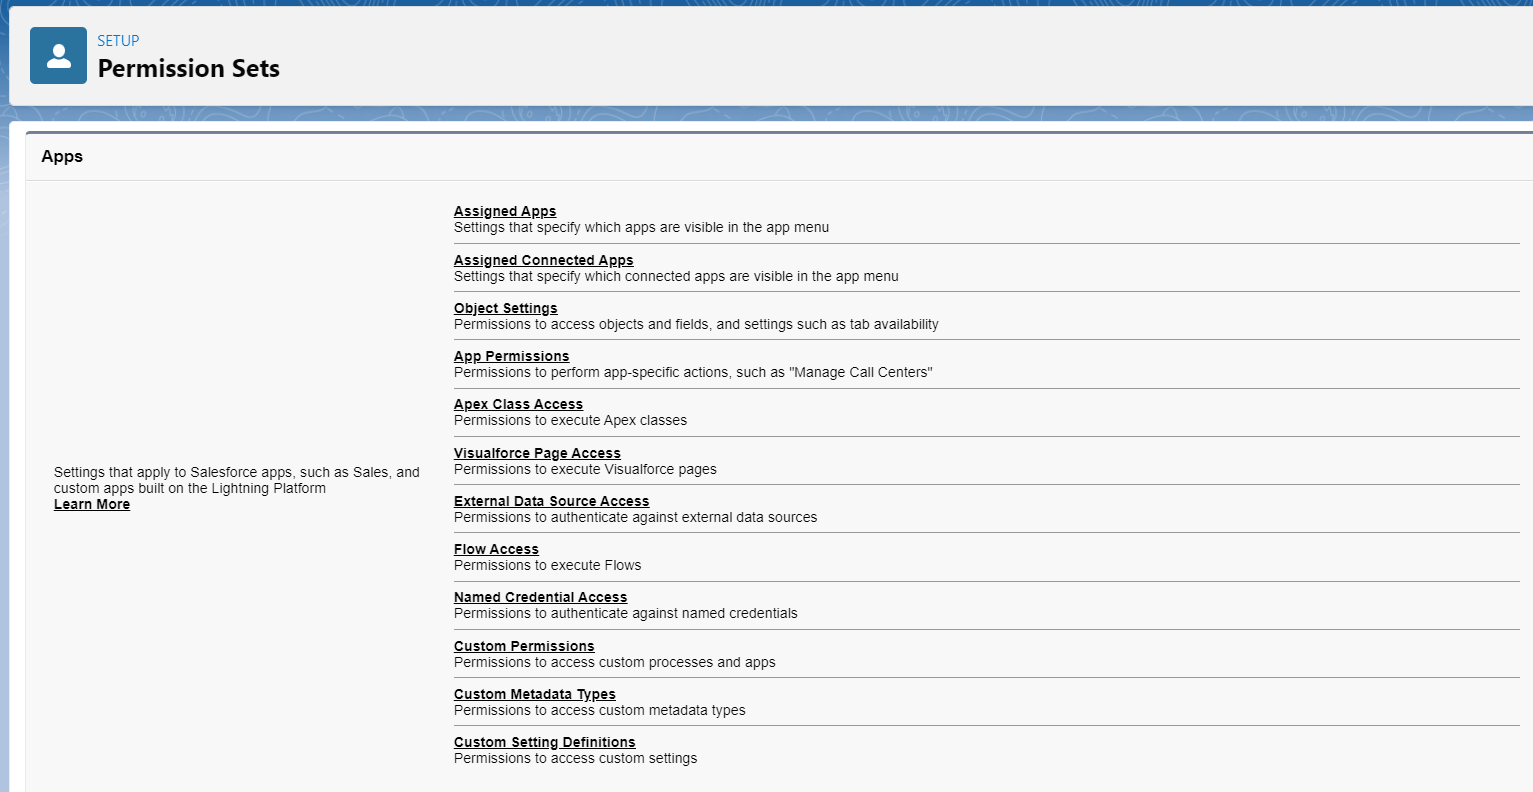
- App Permissions
- Objets Permissions
- Fields Permissions
- User Permissions
- Tab Permissions
- Apex Class permissions
- VisualForce page permissions etc
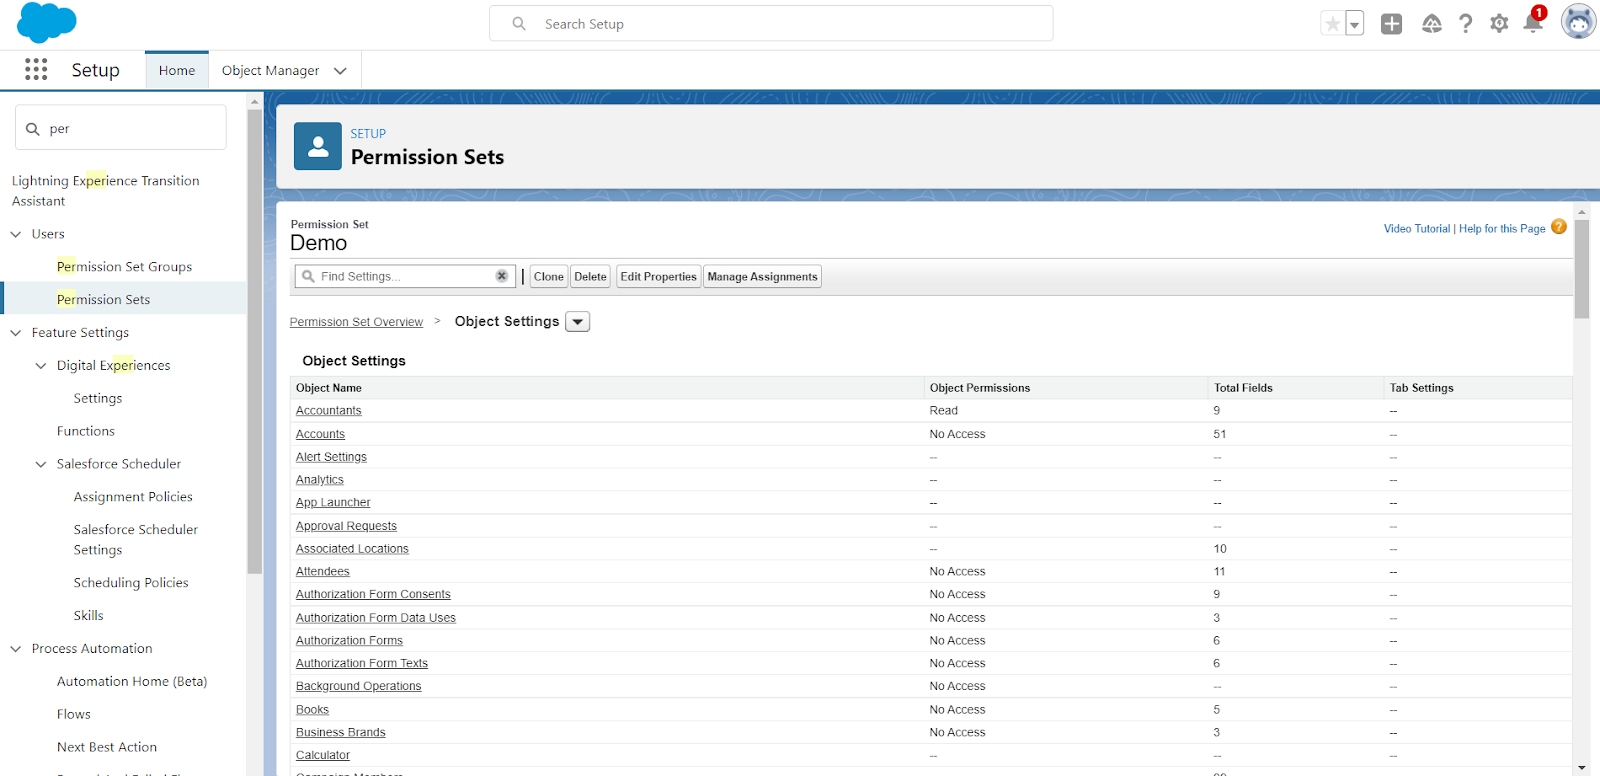
- Now Click on any of the following according to your requirement. Here I am selecting object permissions, i.e., Object Settings.
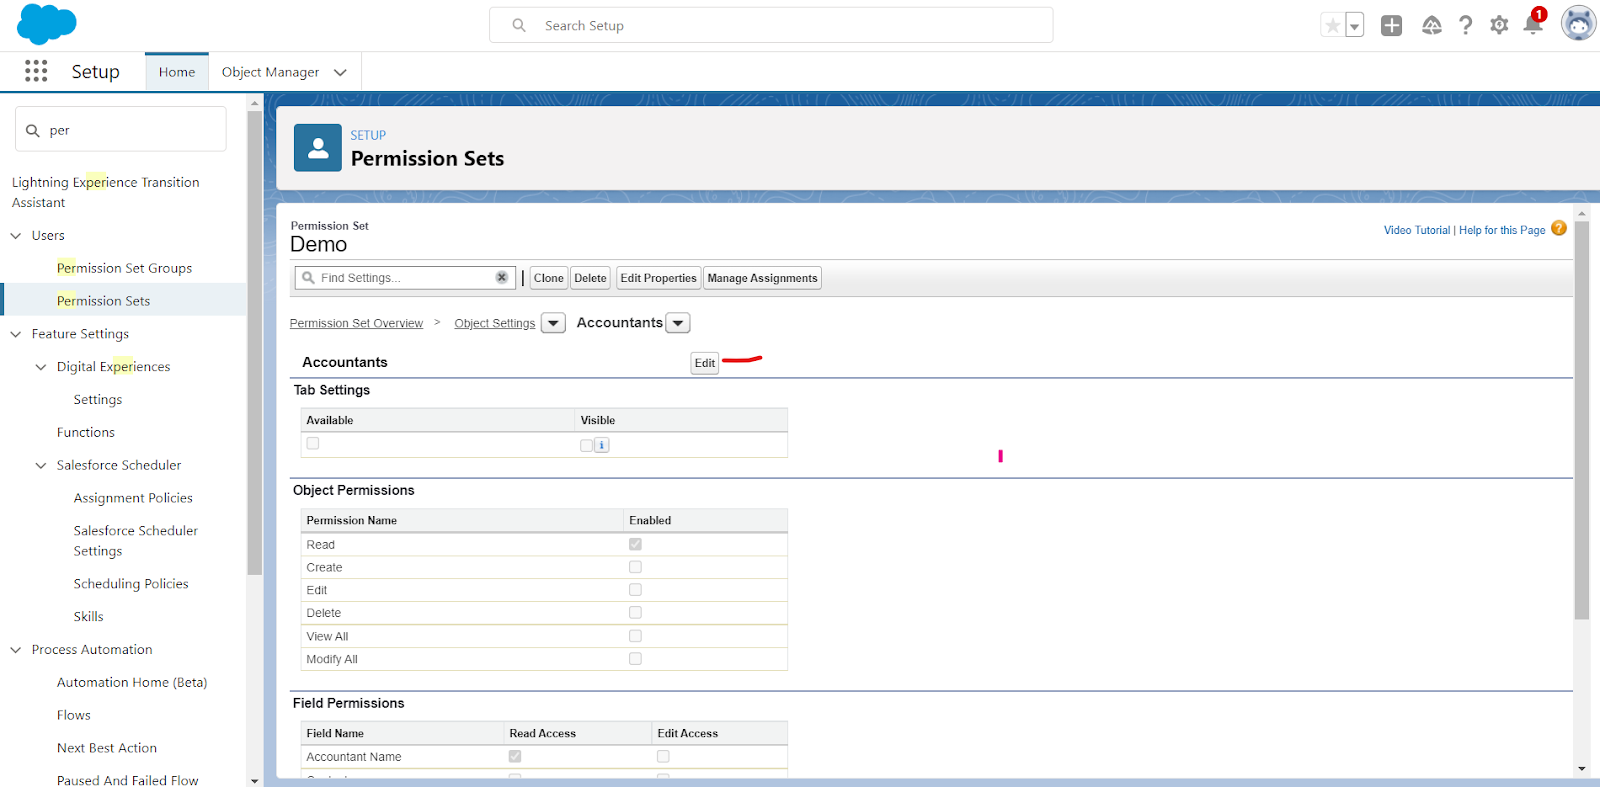
- Click on any object as you want to give extra permissions to that object to any user. Here I am selecting the “Accountants” object.
- Click on the “Edit” button. And manage permissions according to your requirement.
- Click on the ‘Save’ button. Hence your changes are saved.
- After managing permissions on permission sets, you can easily assign this permission set to the user as you want.
Lets Assign Permission Sets to the User
- Go to the permission set and click on it.
- Now Click on the ‘Manage Assignment’ button.
- Click on the “Add Assignment” button.
- Now select the user to whom you want to assign that permission set.
- Click on the “Assign”.
- Now Click on the “Done” button.
Cheers! Your permission set is assigned to the user.
Are you looking for a customized Salesforce solution for your organization to stay one step ahead of your competitors? Please schedule a call with CloudVandana, a reputed Salesforce partner from India, and take Salesforce Staff Augmentation service for end-to-end Salesforce support. Call us now.

Digital Marketing Manager at Cloudvandana Solutions
Request a Free Consultation
YOU MIGHT ALSO LIKE

The Future of Work Management: From Manual Updates to AI-Powered Execution

Salesforce Implementation Checklist for Growing Businesses

Salesforce Health Check Checklist: 15 Things Every Business Should Review Quarterly

Salesforce Consulting Services: When Should a Business Hire an Expert?

Salesforce Automation vs AI Agents: What Should Businesses Use First?