Customize Sections and Fields by using Dynamic Forms

Learn how to make your website truly unique by customizing sections and fields with dynamic forms. This beginner-friendly guide will teach you everything you need to know. In Salesforce, Dynamic form is one of the features in the UI enhancements roadmap in Admin and Lightning keynotes. Basically, this is going to be a game-changing feature that will give admins and consultants the ability to have control over the record pages and page layout. Now, you can directly customize sections and fields of the page as per the business requirements. Let’s take an example as Show a particular field or section when a picklist field has a certain value. Enable your Dynamic Form Steps to customize section and field through Dynamic form Like this, you can customize your fields and sections as per your needs. Request a Free Consultation YOU MIGHT ALSO LIKE
Increase Productivity of Sales Rep with Salesforce Inbox

Discover how Salesforce Inbox can revolutionize your sales team’s productivity. This ultimate guide provides step-by-step instructions and tips to increase sales rep productivity. Integrating Outlook or Gmail with Salesforce is a great way to keep your reps productive with the tools they rely on most. You reduce context switching, so your reps can focus on the important things: Their customers and closing deals. Use Salesforce Inbox productivity features to the email integration to provide your sales reps with more tools. Features include productivity enhancers such as availability scheduling for meetings, tracking when emails are opened, and scheduling when to send emails. Add one or all the productivity features for your sales reps. Salesforce Inbox Features: Steps to Enable and Add Inbox Feature to your Email Integration Select Who Gets Access to Inbox Features You can access this same setting in the Select Who Can Use Inbox section of the Outlook Integration and Sync page. Note: To change the layout or availability of features in the integration, enable Customize Content with App Builder, and select to create an email application pane. Use the Lightning App Builder to customize the pane. You can customize multiple panes that include specific features for different sets of sales reps. For example, if some reps don’t track emails, build a pane that includes all Inbox features, except the one that tracks email. Using dynamic actions you can show the Submit for Approval action button only when the record is eligible for approval instead of always showing by setting conditions. The user will not be distracted and submit records for approval only when it is required. Request a Free Consultation YOU MIGHT ALSO LIKE
Communicating Between Parent and Child In Lightning Web Components
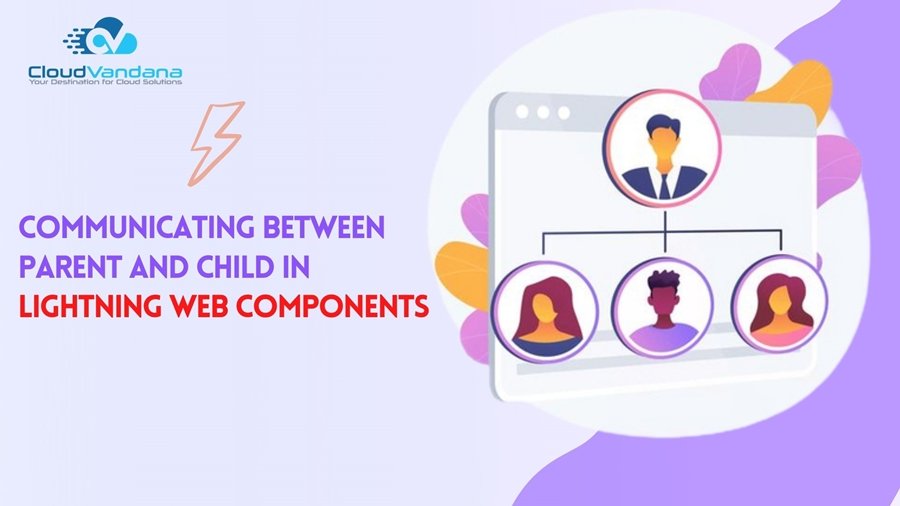
In this blog we will see how to communicate from one LWC to another LWC and pass the data. Why Multiple Components? Now the question is why do we need two different components when we can complete the requirement in one single component? So right now the requirement is simple to pass a value from one component to another but if the requirement is more than that, doing all this in a single component can be a disaster because of the complexity and lines of code. And if we want to modify it we have to search from hundreds of lines of code to get that particular block and then modify it. That is the reason why we create multiple components, each with a different purpose to fulfil and it’s easy to maintain and modify. Step 1: Create two lightning web components. Let’s keep the naming convention easy to understand by naming them Parent and Child. Step 2: Let’s start with writing all the html and styling in the child component. Step 3: Write the Javascript code for our Child component which will create an event and the event then will be cached by our parent component. Also, the data we want to communicate from child to parent is also attached to this event. Step 4: Let’s add the HTML and styling to our Parent component and also catch the event we fired from our Child component by appending ‘on’ in before the event name. We are also going to place our Child component inside our parent component by using <c-componentname></c-componentname>. So in our case it would be <c-child></c-child>. Step 5: Write the JS code so we can show the attached value from Child to Parent component. Step 6: Deploy the code and drag-drop the component on the desired location. Click on save and our component is ready to use. Request a Free Consultation YOU MIGHT ALSO LIKE
Dynamic Content In Pardot

When you need to create multiple variations of email for different segments the Dynamic content can be your savior because it removes the need to create multiple variations. Dynamic content helps you to replace the content within an email based on a particular data point for your records. You can use Dynamic content on Landing pages and your own website, for example, you can tailor the digital experience based on what you know about that person. Here is an Example to use Dynamic Content in Email Template Here you can check this Screenshot NOTE: The dynamic content variation populates in the recipient’s inbox. Verify the dynamic content by creating a test prospect that matches the criteria for each variation. Then add the prospects to a test list. If you need help setting up the Dynamic Content, you can get in touch with us here. Request a Free Consultation YOU MIGHT ALSO LIKE
Create New Related Record In One Click by Using Quick Action

Creating related records can be a tedious task, but not anymore. Learn how to use quick actions to create new related records in just one click and maximize your efficiency. As we know that to create a related record for any object, you must go to the particular record on which you want to create that related record and scroll down to go to the related list to find the button “New” with the object name, and then you have to click on that. From this process, you can create a new related record. Instead of this process, now you can create a button or link which, on click, opens an interface where you can create the required record with the selected fields and some predefined fields without moving to another page. All this can be done with the help of Quick Action. With this setup, You can not only create records but also update records, log calls, send emails, and also call Visualforce Pages. Types of Quick Actions: Object-specific quick actions, specify that whenever you want the action to be used only on a particular Object, you use Object-specific actions. So basically, These actions are displayed on the details page layout of a record. It can only be used on the Object Page layout of the Object on which it is created. Let’s look for an example. You have Account and Order objects in Salesforce. If you want to create an Order from Account, you need to navigate to the related list and select the ‘New Order’ button. Then it will pop up with another page, where you can enter details of an Order and a new Order will be created. Now here, will create a ‘Quick Action’ button which on click creates Order without navigating to another page. Global actions, This can be used anywhere in Salesforce globally on the Groups page, Home page, and chatter feed page. As these are not associated with any other objects. It can be used on any object’s page layout and added to the global publisher layout. From Global actions, let users create or update records, log call details or send emails. When a global ‘Create action’ is created, it creates a new record that is not related to any other object. Like this, you can create Quick Actions to decrease the time taken to perform some types of Actions such as creating or updating records, send emails, log a call, or we can also call Visualforce pages. Steps to create Object-specific Quick Actions in Salesforce: Let’s take an example – Create a Quick Action for a new opportunity record (with some predefined fields) on the Account object. Step 1 – Go to Object Manager and select Buttons, Links, and Actions and then New Action. Step 2 – Create New Action as Create New Opportunity by given details and also define some predefined values for opportunity record. Step 3 – Now go to Page Layout and drag the Create New Opportunity from Mobile and Lightning Action into Salesforce Mobile and Lightning Experience Actions. Then go to your app (Sales) and refresh the page and open any account record. Step 4 – After clicking on Create New Opportunity, you will get a pop-up page for opportunity record creation whereas you will have to fill Opportunity Name and for other fields, you have already defined by using predefined field values. Step 5 – An opportunity record has been created on Account. Step 6 – This is an opportunity record details that is created by using Quick Action. Like this, you can add action on any object to create, update, send emails and log a call etc. For more information, visit CloudVandana. Request a Free Consultation YOU MIGHT ALSO LIKE
Use Dynamic Actions to Control Visibility in Lightning App Builder
Dynamic Actions: Dynamic Actions is a powerful administrative tool available in lightning app builder that enables you to create record pages with buttons and actions that are relevant to your users based on any record field value or user’s profile. Instead of using a page layout editor you can assign actions in the Lightning App Builder and apply filters to control when and where actions appear for users. This makes your pages more intuitive and responsive. Where it is available: Dynamic action needs to be enabled from the Lightning app builder. Currently, dynamic actions can be enabled for both custom and Standard objects for desktop, but this feature for standard objects is in the beta phase. How to Enable: To enable dynamic actions for a custom object on desktop, add or select the Highlights Panel component on a custom object’s record page. In the Highlights Panel properties pane, click Upgrade Now and step through the migration assistant to migrate actions or start with new ones. To enable dynamic actions for a standard object on a desktop, add or select the Highlights Panel component on the object’s record page. In the Highlights Panel properties pane, select Enable Dynamic Actions (Beta, desktop only). How to Use: To add an action in any of the dynamic action scenarios, click Add Action (1) in the properties pane. In the Actions modal, choose an action and click Add Filter (2) to assign visibility rules based on record field, device type, logged-in user profile, and other filters. An eye icon (3) next to an action’s name indicates that visibility rules are applied. If you migrate actions from a page layout, you can modify them in the Actions modal. Example: Using dynamic actions you can show the Submit for Approval action button only when the record is eligible for approval instead of always showing by setting conditions. The user will not be distracted and submit records for approval only when it is required. Request a Free Consultation YOU MIGHT ALSO LIKE
Using Lightning Web Components in Salesforce Lightning
What is Lightning Web Component? Now you can build Lightning Components using two programming models: Lightning Web Components and the original Aura components. Lightning web components are custom HTML elements that are built using HTML and modern javascript. It is easier to handle all the components and easy to maintain. It works fast as compared to older Aura components because it uses the latest web stack and ECMAScript7. Though you can design your own UI using CSS and HTML it also provides LDS i.e. Lightning Design Systems out of the box which makes it easier and faster to develop components. A component to get weather information of a location entered. Create a Lightning Web Component: Before we start, you should have the following things’ setup in order to start the development of the component. Steps to create a Project: Start coding: We have successfully created the project, now we are going to create a lightning web component and start working on it. Structure of LWC: It consists of three main files. They are .html, .js and .xml. All the HTML goes to .html and all the logic for rendering and operations for Apex are done in .js file. The .xml file is just the configuration file that is used to provide information about where the component should be visible and the title etc. HTML: We are just making a basic LWC in which we will show some text on a card. JS: No need to change anything in .js file since we are just showing the text in the component. XML: We need to set isExposed to true and also specify the target where we want this component to be visible. In this case it is lightning__RecordPage. Deploy: In order to deploy, open your command palette and click on Deploy Source to Org. Adding the component to a Record Page: Request a Free Consultation YOU MIGHT ALSO LIKE
Trigger to Prevent Record Deletion
Here is the simplest trigger to restrict deletion for any particular User or Profile Steps to create a trigger in Salesforce: Step 1 – Login into your Salesforce org and click on the gear icon located in the top right corner of the org. It will open a dropdown, you need to click on the ‘Developer Console’. It will open the Developer Console for you. Now click on the ‘File → New → Apex Trigger’ as shown below. It will prompt you to enter a name and select the object on which you want to run the trigger and then click on ‘Submit’ to create a trigger. After the record is created, it will open the file in the same window. An example is shown below. There are two examples shown: 2. Restrict a user from deleting a Record. After writing the code, just save the record by pressing ‘Ctrl + S’. Step 2 – Open a contact record in your Salesforce org. Click on the inverted triangle icon located on the top-right of the contact record. It will open a dropdown, click on the ‘Delete’. It will prompt you to confirm the delete action by clicking on the ‘Delete’ button. As soon as you click on the button, you will see the error message which we wrote in our trigger class that ‘You are not allowed to delete Contact records!’. Protect what matters—let CloudVandana help you set up properly. Request a Free Consultation YOU MIGHT ALSO LIKE
How to Find Prospect CRM Status in Pardot

Having trouble with finding out the CRM Status of Prospects in Pardot? No worries, Pardot Automation Rule here to the rescue. As known, Pardot comes with automation rules which allow you to perform certain marketing and sales actions based on criteria that you specify. It allows you to perform specific tasks to help you achieve your marketing goals. Automation rules make your job easier in a variety of ways like Lead qualification, assignment, task creation, assign to your sales representatives, applying tags, adding to campaigns, etc. Steps you need to follow: Note: This rule will filter on all prospects based on the status of the prospect’s synced CRM record. If you need help setting up the Automation, you can get in touch with us here. Request a Free Consultation YOU MIGHT ALSO LIKE
Assignment Rules In Salesforce
Assignment rules in Salesforce are basically used to automatically assign Case or Lead to the owner (Queue or User). This assignment rule is used to automate owner assignments on Lead and Case based on conditions on Case and Lead. Types of Assignment Rule There are two types of assignment rules. Lead Assignment Rule: The Lead Assignment rule describes how leads are assigned to queues or users as they are created manually, imported via the Data Import Wizard, or captured from the web. Case Assignment Rule: In Case Assignment rule, it specifies how cases are assigned to users or queues as they are created manually, using On-Demand Email-to-Case, Email-to-Case, Web-to-Case, the Customer Portal and Outlook. Create or Set-up assignment rules After this setup, click Save, or Save & New to save the entry and create more entries. Assignment Rule Example: Following is the Lead Assignment rule which assigns Lead to queues based on City, Company, and Industry. Like this, you can create more rules for assigning a different Queue/User for different criteria. Request a Free Consultation YOU MIGHT ALSO LIKE


