

LEAD SCORING AND GRADING IN PARDOT

Want to implement intelligent lead qualification in Pardot? CloudVandana’s Pardot-certified experts can help you set up, audit, and optimize scoring and grading models tailored to your go-to-market strategy. Introduction: Why Smarter Lead Qualification is Mission-Critical In the high-stakes world of B2B marketing, not all leads are created equal. Without a method to evaluate interest and fit, your sales team risks wasting time on poor prospects while high-quality leads fall through the cracks. Pardot (now Marketing Cloud Account Engagement) offers two robust tools—lead scoring and lead grading—that allow marketers to prioritize the right leads for the right conversations. Table of Contents Want to implement intelligent lead qualification in Pardot? CloudVandana’s Pardot-certified experts can help you set up, audit, and optimize scoring and grading models tailored to your go-to-market strategy. Introduction: Why Smarter Lead Qualification is Mission-Critical Understanding the Difference Between Scoring and Grading What Is Lead Scoring? What Is Lead Grading? Why You Need Both Setting Up Lead Scoring in Pardot Default Pardot Scoring Model Customizing Scoring Rules Using Score Degradation Triggering Score Threshold Actions Implementing Lead Grading in Pardot Grading Based on ICP Criteria Creating Grading Profiles Profile Rules and Adjustments Syncing Grading with CRM Data Real-World Examples of Scoring + Grading in Action Example 1: Content-Engaged but Poor Fit Example 2: Low Score, Perfect Profile Example 3: High Score, High Grade Automating the Journey Based on Score + Grade Progressive Profiling to Fill Data Gaps Dynamic List Segmentation Lead Assignment Rules Campaign Personalization Reporting and Optimization Pardot Reports for Score/Grade Trends Aligning Score + Grade with Pipeline Metrics A/B Testing Score Thresholds Common Mistakes and How to Avoid Them Overvaluing Vanity Metrics Neglecting Grade Calibration Failing to Align Sales and Marketing Advanced Use Cases and Best Practices Account-Based Scoring Models Integrating with Salesforce Campaign Influence Syncing with Sales Cloud Einstein Using Scoring Categories The Strategic Value of Lead Scoring and Grading Better Alignment, Faster Conversions Predictive Funnel Management Intelligent Budget Allocation Conclusion: Data-Driven Lead Qualification Isn’t Optional Frequently Asked Questions YOU MIGHT ALSO LIKE Understanding the Difference Between Scoring and Grading What Is Lead Scoring? Lead scoring assigns points based on a prospect’s behaviors—such as email opens, clicks, page views, form submissions—that indicate interest or engagement. What Is Lead Grading? Lead grading evaluates how closely a prospect matches your ideal customer profile based on explicit attributes like job title, industry, company size, or location. Why You Need Both Scoring and grading are complementary. A highly engaged but poorly matched lead (high score, low grade) is less valuable than a moderately engaged perfect-fit lead (moderate score, high grade). Setting Up Lead Scoring in Pardot Default Pardot Scoring Model Out of the box, Pardot assigns points for basic actions: 50 for form completion, 10 for email click, etc. Customizing Scoring Rules Admins can adjust scores to align with your funnel velocity. Give higher weight to pricing page views, demo requests, or specific content downloads. Using Score Degradation Reduce scores for leads that haven’t engaged recently. This keeps your database fresh and signals waning interest. Triggering Score Threshold Actions Use automation rules to notify reps or assign leads to queues when a lead hits a certain score. Implementing Lead Grading in Pardot Grading Based on ICP Criteria Assign grades (A+ to F) based on key fit attributes—company size, location, job level, industry match. Creating Grading Profiles Define multiple grading profiles if you sell to different personas. For instance, a CMO and a Director of IT may have different ideal criteria. Profile Rules and Adjustments Each match increases the grade by 1/3 of a letter; mismatches can decrease the grade. Configure these under Automation > Profiles. Syncing Grading with CRM Data Use CRM fields to automatically adjust grades. For example, when a prospect’s title includes “VP,” boost their grade. Real-World Examples of Scoring + Grading in Action Example 1: Content-Engaged but Poor Fit A freelancer downloads five whitepapers and attends a webinar. High score, but they’re not your buyer persona. Grade = D. Example 2: Low Score, Perfect Profile A CFO visits one pricing page. Low score, but Grade = A. Worth a sales outreach. Example 3: High Score, High Grade An enterprise CIO requests a demo after visiting multiple high-value pages. High score + Grade A. Fast-track this lead to sales. Automating the Journey Based on Score + Grade Progressive Profiling to Fill Data Gaps As leads interact with more forms, collect additional info to complete the profile for accurate grading. Dynamic List Segmentation Build lists like “High Score + Grade A” for targeted nurturing or SDR outreach. Lead Assignment Rules Assign leads with Grade B and above to sales. Keep lower grades in marketing nurture. Campaign Personalization Personalize email content based on fit and engagement level. Reporting and Optimization Pardot Reports for Score/Grade Trends Analyze which behaviors drive the highest scores and which attributes correlate with high conversions. Aligning Score + Grade with Pipeline Metrics Track close rates by lead score/grade combinations to refine scoring models. A/B Testing Score Thresholds Adjust scoring rules and test impact on MQL quality and velocity. Common Mistakes and How to Avoid Them Overvaluing Vanity Metrics Clicks don’t always equal intent. Use deeper behaviors (pricing page, ROI calculator) for better signals. Neglecting Grade Calibration Your ICP evolves. Revisit grading criteria quarterly to reflect new segments or priorities. Failing to Align Sales and Marketing Ensure sales reps understand how score and grade work so they can prioritize appropriately. Advanced Use Cases and Best Practices Account-Based Scoring Models Roll up scores across multiple contacts at an account to inform ABM strategies. Integrating with Salesforce Campaign Influence See how scoring/graded leads contribute to campaign-attributed revenue. Syncing with Sales Cloud Einstein Use Pardot scores and grades to influence lead conversion likelihood in Einstein Lead Scoring. Using Scoring Categories Segment scores by product line or region for multi-solution go-to-market models. The Strategic Value of Lead Scoring and Grading Better Alignment, Faster Conversions Scoring and grading get marketing and sales aligned on quality, not just quantity. Predictive Funnel Management Identify bottlenecks
With One Click, View Opportunities Owned by Your Team

View Opportunities Owned by Your Team with One Click in Lightning Experience Time is the heartbeat of revenue operations. The faster a sales leader can see the pipeline owned by their team, the faster they can act—whether that means reallocating resources, coaching reps, or accelerating deals. In Salesforce Lightning Experience, the ability to view team-owned opportunities with a single click isn’t just a productivity feature—it’s a strategic advantage. This article dives into the configuration, logic, use cases, and best practices to enable this high-impact view. The Problem with Default Opportunity Views Manual Filters Waste Time Default Salesforce views often require users to manually filter by owner or role, eating up time with every login. Inconsistent Data Visibility Without a consistent way to surface team-level opportunities, managers may miss key updates, overlook risks, or duplicate efforts. Lack of Standardization Across Roles Sales managers, regional leaders, and operations staff may all need to view team pipelines—but without a single standardized view, reporting and collaboration suffer. The Power of “My Team’s Opportunities” Built-In Role Hierarchy Salesforce uses role hierarchy to determine visibility. When configured correctly, users higher in the hierarchy can view the records owned by users below them. Instant Insights for Managers With one click, a manager can surface every open opportunity assigned to their direct and indirect reports—sorted, filtered, and ready for review. Unified Forecasting and Coaching Whether reviewing deal health or prepping for 1:1s, team-owned opportunity views empower better forecasting and real-time rep coaching. Enabling Team Opportunity Views in Salesforce Step 1: Ensure Role Hierarchy is Configured Go to Setup > Roles. Make sure managers are correctly positioned above their team members. Step 2: Customize List Views Navigate to the Opportunities tab > Click the gear icon > Select “New List View.” Step 3: Use the “My Team’s Opportunities” Filter Under filters, choose “My Team’s Opportunities” from the Owner field options. Step 4: Add Useful Fields to the List View Include critical fields such as Stage, Close Date, Amount, Opportunity Owner, and Forecast Category. Step 5: Set the View as Default (Optional) Allow users to make this the default view for faster access when opening the Opportunities tab. Advanced Customization with Dynamic Dashboards Create a Role-Based Dashboard Design dashboards with filters that automatically adjust to the viewer’s role or hierarchy. Add Opportunity Pipeline Components Include charts showing total pipeline, deals by stage, and aging opportunities. Enable Mobile Access for Managers on the Go With the Salesforce mobile app, managers can tap into this visibility from anywhere. Use Cases for One-Click Team Opportunity Views 1:1 Rep Coaching Quickly spot stalled deals or high-value opportunities that need attention during regular rep meetings. Regional Forecast Reviews Regional directors can review all deals in their territory using the team filter—no manual exports needed. Executive Pipeline Reviews Sales VPs can drill down into any team in the org with consistent, high-level visibility. Cross-Functional Collaboration Marketing and RevOps can use team views to align campaign efforts with opportunity movement. Common Pitfalls and How to Avoid Them Pitfall 1: Misconfigured Role Hierarchy If roles aren’t mapped properly, team views won’t reflect the right data. Always test role visibility. Pitfall 2: Missing Owner Field Access Ensure that all users have visibility to the Owner field and correct permissions for opportunity records. Pitfall 3: Overcomplicated Filters Keep list view filters simple. Too many conditions make the view harder to maintain and interpret. Best Practices for Operational Excellence Standardize Across Teams Create a shared template or deploy a list view via Change Set for consistency across departments. Train Managers to Use Views Effectively Teach sales managers how to act on the data: flag risk, run QBRs, and update forecasts. Combine with Inline Editing Let managers update fields like Stage or Forecast Category directly from the list view. Review List Views Quarterly Business needs evolve. Revisit and refine list view fields and filters at least once per quarter. Enhancing Visibility with Reports and Alerts Build a “My Team Pipeline” Report Create a custom report using the “My Team’s Opportunities” scope for deeper insights. Schedule Weekly Pipeline Emails Send automated pipeline summaries to managers every Monday morning. Set Up Notifications for At-Risk Deals Use process builder or flow to trigger alerts when high-value deals are stuck in stage. Bringing It All Together with App Pages Create a Manager-Focused Lightning App Page Add tabs for team list view, reports, dashboards, and notes in one workspace. Customize Navigation Items Make “Team Opportunities” a top item in the navigation bar to save time. Disable Personalization (If Needed) Admins can lock down the layout to ensure consistency across users. Why CloudVandana Recommends This Setup As Salesforce experts, we’ve seen that giving managers quick, reliable access to team data accelerates decision-making and improves pipeline health. It supports agile operations, eliminates silos, and empowers front-line leaders to act faster. Conclusion: Visibility Creates Velocity When you enable sales leaders to view their team’s opportunities with a single click, you remove friction from the sales process. You unlock data-driven leadership, faster decisions, and higher accountability. In Salesforce Lightning Experience, it’s not just possible—it’s essential. Need help setting this up in your org? Contact CloudVandana to optimize your Salesforce experience today. Frequently Asked Questions 1. What is the “My Team’s Opportunities” list view in Salesforce?The “My Team’s Opportunities” list view allows users to quickly see all opportunities owned by users beneath them in the role hierarchy. It provides a consolidated view for managers and team leads without needing to switch between individual user records. 2. How do I enable role hierarchy to use team-based list views?Go to Setup → Sharing Settings, and ensure that Grant Access Using Hierarchies is enabled for the Opportunity object. Then, configure your organization’s Role Hierarchy under Roles so that managers can access records owned by their direct reports. 3. Can I customize the fields shown in the “My Team’s Opportunities” view?Yes. You can customize columns in any list view, including “My Team’s Opportunities”, using the gear icon (⚙️) → Select Fields to Display. You can
Set Default Product Quantity for Your Opportunities
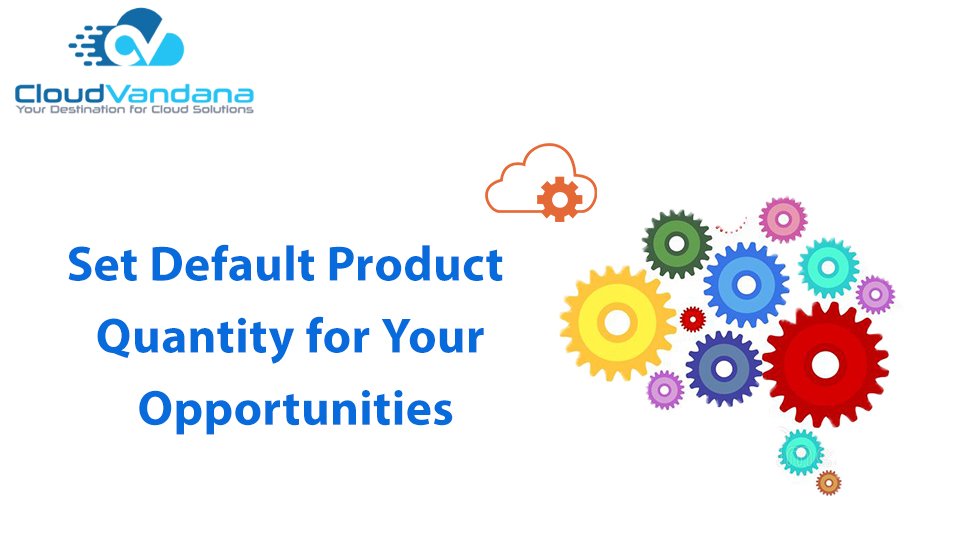
Streamline your Salesforce opportunities by setting a default product quantity. Save time, ensure data consistency, and improve sales efficiency with smart automation. Table of Contents Set Default Product Quantity for Your Opportunities Understanding Opportunity Products in Salesforce What Are Opportunity Products? Why Quantity Defaults Matter Use Cases for Setting Default Product Quantities Standardized Product Bundles Starter Quantities for Sales Enablement Preventing Data Gaps Method 1: Use Flow Builder to Set Default Quantity Overview of Flow Create a Record-Triggered Flow Add Decision Element (Optional) Set Quantity with Assignment Save and Activate the Flow Method 2: Use Default Field Values in Lightning App Builder (Beta) Field Defaults in Screen Flows (Beta) Use Variables to Set Quantity Method 3: Apex Trigger (Advanced) When to Use Apex Sample Apex Code Test Class for Deployment Handling Existing Products with No Quantity Create a Scheduled Flow or Batch Class Reporting Impacts and Benefits Cleaner Pipeline Forecasts Improved User Adoption Better Metrics for Product Performance Considerations and Best Practices Don’t Override Manual Edits Use Conditional Logic if Needed Document the Automation What This Means for Admins and Sales Ops Conclusion: Build Once, Save Time Forever Frequently Asked Questions YOU MIGHT ALSO LIKE Set Default Product Quantity for Your Opportunities In the fast-paced world of sales operations, every click matters. One seemingly minor inefficiency—like manually entering product quantities for every opportunity—can translate to wasted time, inconsistent data, and user frustration. Setting default product quantities in Salesforce is a subtle but powerful customization that helps your team work faster, reduce errors, and stay consistent. Whether you’re handling hundreds of line items or standardizing your sales packages, setting default quantities streamlines workflows and boosts data quality. This guide will walk you through the what, why, and how of setting default product quantities in Salesforce. Understanding Opportunity Products in Salesforce What Are Opportunity Products? Opportunity Products (also called OpportunityLineItems) represent the products added to a sales deal (opportunity) in Salesforce. They capture quantity, price, product name, and more. Why Quantity Defaults Matter If most of your deals start with the same quantity per product—say, one license or a default 10-user bundle—having Salesforce default that quantity can eliminate repetitive data entry and prevent human error. Use Cases for Setting Default Product Quantities Standardized Product Bundles Your organization may offer fixed packages (e.g., 1 device license + 5 support units). Set defaults to match your SKUs. Starter Quantities for Sales Enablement Provide your team with a “starter quantity” so they can modify when needed, but always begin from a logical base value. Preventing Data Gaps Avoid zero quantity or blank fields by prepopulating a meaningful default. This helps with reporting and forecasting accuracy. Method 1: Use Flow Builder to Set Default Quantity Overview of Flow Salesforce Flow allows you to automate logic without code. You can build a record-triggered flow to set default quantity. Create a Record-Triggered Flow Add Decision Element (Optional) Use a decision element to restrict when the flow runs (e.g., only on certain opportunity types or product families). Set Quantity with Assignment Save and Activate the Flow Label your flow, save, and activate. Test with sample opportunities. Method 2: Use Default Field Values in Lightning App Builder (Beta) Field Defaults in Screen Flows (Beta) If your org uses screen flows for adding products, you can configure default field values on screen components. Use Variables to Set Quantity Prepopulate the quantity field with a default value using flow variables. Method 3: Apex Trigger (Advanced) When to Use Apex If your business logic is complex, or you want to update quantity only when specific conditions apply, use Apex triggers. Sample Apex Code Test Class for Deployment Deploy your trigger with a test class to meet code coverage requirements. Handling Existing Products with No Quantity Create a Scheduled Flow or Batch Class Update existing opportunity products with no quantity defined. Use Flow or Apex depending on scale. Reporting Impacts and Benefits Cleaner Pipeline Forecasts Default values help maintain consistency across your pipeline and improve revenue forecasting. Improved User Adoption Sales reps are more likely to enter complete opportunities when fewer fields require manual input. Better Metrics for Product Performance Ensures quantity values are always tracked, supporting accurate product-level reporting. Considerations and Best Practices Don’t Override Manual Edits Ensure your logic applies only when Quantity is blank—respect user input where appropriate. Use Conditional Logic if Needed You might want different defaults based on region, product category, or opportunity stage. Document the Automation Clearly document why and where this automation runs to avoid confusion among future admins. What This Means for Admins and Sales Ops Setting a default quantity might seem like a minor change, but it adds up across thousands of deals. It’s a low-effort, high-impact optimization that reduces friction for reps and builds data reliability for the business. Conclusion: Build Once, Save Time Forever With just a few clicks or lines of code, you can embed operational excellence into your sales motion. Setting default product quantities in Salesforce removes ambiguity, saves precious time, and fosters a smoother selling experience. Want expert help configuring Salesforce for maximum sales efficiency? Contact CloudVandana today. Frequently Asked Questions 1. Can I set different default quantities for different products?Yes. By using conditional logic in Salesforce Flow or Apex, you can define custom default quantities based on product family, SKU, or opportunity type. 2. Will this override quantities that users manually enter?No—if configured properly. You can ensure the automation only sets a default when the quantity field is blank, preserving manual user input when present. 3. Is it necessary to use code to set default product quantities?Not always. Admins can use Flow Builder for most use cases without writing code. Apex is only necessary for more complex business logic. Request a Free Consultation YOU MIGHT ALSO LIKE
Sort Products on Opportunities the Way You Want in Lightning Experience

View and sort products on Opportunities with ease in Salesforce Lightning. Discover how to reorder Opportunity Products for cleaner quotes and accurate sales data. Introduction: Why Product Order Matters More Than You Think In the intricate world of B2B sales, clarity and control over product presentation can be the linchpin for operational accuracy and client confidence. Whether you’re bundling services, packaging physical goods, or quoting multiple SKUs, the way products appear on an Opportunity record isn’t just cosmetic—it’s critical. Salesforce Lightning Experience introduces a modern, flexible way to sort and reorder Opportunity Products (also known as OpportunityLineItems), empowering sales reps, operations teams, and finance stakeholders with precision and polish. Understanding OpportunityLineItems in Salesforce What Are Opportunity Products? Opportunity Products are line items tied to a specific Opportunity. Each record includes product name, quantity, price, discount, and more. These items collectively define the value of a sales deal. Where Order Impacts Business From invoice formatting to quoting sequences, the way products appear can affect downstream systems and client perception. Challenges with Default Product Sorting The Default Sorting Problem Historically, Salesforce displayed Opportunity Products in the order they were added, which isn’t always useful. Lack of Control for Sales Reps Sales reps couldn’t easily adjust the display order without editing and re-adding products. Friction for Finance Teams Improper ordering can result in messy invoices or unclear pricing documentation. Introducing Custom Sorting for Opportunity Products A Game-Changer in Lightning Salesforce now allows manual sorting of Opportunity Products via a drag-and-drop UI. Where to Find It Accessible directly within the Opportunity record in Lightning Experience, this feature is now standard across many orgs. Enabling Product Sorting in Your Org Verify Lightning Experience is Enabled Go to Setup → Lightning Experience Transition Assistant to confirm. Use Standard Page Layouts or Dynamic Forms Sorting is supported in standard page layouts and Dynamic Forms configurations. Check User Permissions Ensure users have edit access to Opportunities and related Products. How to Sort Opportunity Products in Lightning Step-by-Step Instructions Real-Time UI Preview Changes reflect immediately for all viewers of the Opportunity record. Use Cases for Custom Sorting Bundled Offerings Present your solution in a narrative sequence (e.g., software → setup → training). Highlight High-Value Products Put flagship items first for visibility and emphasis. Segment Add-Ons and Services Group optional or post-sale items toward the bottom. Best Practices for Sales Ops Teams Standardize Product Sequences by Business Unit Create templates or guidelines for product order based on deal type. Train Sales Teams on Sorting Benefits Demonstrate how sorted line items lead to better customer communication. Automate Checks for Incomplete Orders Build flows or validation rules to catch out-of-sequence product lists. Integration with CPQ and External Systems Compatibility with Salesforce CPQ Custom sorting complements CPQ-configured bundles but doesn’t override CPQ rules. Data Consistency Across Systems Ensure sorted order is retained in integrated invoice or ERP platforms via API mapping. Sorting Limitations to Keep in Mind Applies to Lightning Only Classic users won’t see the custom order. Sorting Persists per Opportunity Each Opportunity maintains its own product sequence—not global. No Auto-Sorting Rules (Yet) Sorting is manual unless customized via Apex or Flow. Tips for Admins: Behind-the-Scenes Enhancements Audit Trail for Product Reordering Enable Field History Tracking on OpportunityLineItem if custom fields are used for sorting metadata. Create a Custom Field for Sequence Use a numeric field for API-driven sorting or reporting. Flow Example: Auto-Assign Default Order Build a screen flow or auto-flow that assigns sequence numbers when products are added. Reporting Implications Create Reports by Custom Sort Order Use your sequence field to report on consistent product patterns. Improve Forecast and Quoting Accuracy Sorted products help stakeholders analyze deal structure more intuitively. What It Means for End Users A Cleaner, Faster UI Experience Sales reps enjoy the power of reordering without technical intervention. Customer-Facing Consistency Sales collateral and quotes now reflect a thought-out, professional order. Why It Matters to Executives Boosted Sales Efficiency Less time fiddling with product order means more time selling. Strategic Selling Support Executives get cleaner data to understand how deals are built. Empowering Control Over Deals Sorting Opportunity Products in Salesforce Lightning isn’t just a cosmetic feature. It’s a tangible upgrade to your sales process that enhances precision, professionalism, and productivity. It puts more power in the hands of your reps and cleaner data into the hands of your leaders. Need Expert Setup? Want to configure product sorting workflows and automation across your org? Contact CloudVandana for tailored Salesforce customization and implementation. FAQs 1. Can I sort Opportunity Products using automation instead of manual drag-and-drop?Yes. While Salesforce Lightning Experience supports manual sorting via drag-and-drop, admins can create automation using Flows or Apex to assign sort order values to a custom field (e.g., a sequence number). This can be useful when dealing with templated product bundles or automating based on business logic. 2. Does custom product sorting affect how quotes are generated in Salesforce CPQ?Not directly. Salesforce CPQ uses its own configuration logic and product rules to determine line item order. However, if you’re syncing Opportunity Products with CPQ quotes, ensure both systems use consistent sort fields or custom logic to align outputs. 3. Is the custom sort order visible in Salesforce Classic or on mobile?No. The custom sort order for Opportunity Products is a Lightning Experience feature and does not apply to Salesforce Classic. On mobile, visibility may vary depending on your page layout and component configurations. Request a Free Consultation YOU MIGHT ALSO LIKE
How To Warm Up New IP Address in Pardot

Learn how to warm up a new IP Address in Pardot to protect email deliverability and reputation. Follow step-by-step best practices, schedules, and technical setup guidance. Email isn’t just about sending—it’s about being received. When launching campaigns from a new dedicated IP address in Pardot (Account Engagement), a critical and non-negotiable process must be followed: IP warming. This isn’t merely a technical step. It’s a strategic imperative. IP Address in Pardot Without warming, your perfectly crafted emails may never make it to the inbox. Instead, they may be filtered, rejected, or silently discarded. Email service providers (ESPs) like Gmail, Outlook, and Yahoo don’t trust unfamiliar senders. They expect a track record. Warming helps you establish that trust. Pardot, being a B2B-focused platform, emphasizes reputation-driven deliverability. Dedicated IPs in Pardot are powerful but require careful handling. Rushing into high-volume sending on a fresh IP is akin to opening a floodgate without securing the dam—it’s bound to cause a collapse. This article outlines exactly how to avoid that. What Is IP Warming? IP warming is the methodical increase of email volume over a period of time from a new dedicated IP address. This allows ISPs to assess your behavior and recipient engagement in a controlled, predictable manner. Internet Service Providers monitor new senders closely. They want to understand how recipients react. Are emails being opened? Are users clicking links? Are people unsubscribing—or worse, reporting them as spam? If you push too much volume too soon, they assume you’re a spammer. It’s not personal. It’s algorithmic. Think of it as building a digital reputation. Like building a credit score, trust isn’t granted instantly—it’s earned incrementally through consistent, positive behavior. Dedicated IP vs Shared IP in Pardot Pardot offers two types of IP infrastructure for email delivery: shared IP pools and dedicated IPs. With a shared IP, you send alongside other businesses. This approach distributes risk, but it also means your deliverability is tied to others’ behavior. If another sender on the same IP behaves badly, you may suffer consequences even if your practices are clean. A dedicated IP, on the other hand, gives you full ownership. You’re in control of your reputation. It’s ideal for high-volume senders or organizations prioritizing long-term domain authority. But with control comes responsibility. Dedicated IPs start with no history. ISPs treat them with suspicion. That’s why warming is essential—it establishes your identity and proves you can be trusted. The Risks of Not Warming Your IP Failing to warm your IP properly can result in severe consequences. Your emails may: These are not minor issues. In some cases, once a domain is tarnished, recovery may take months—if it’s even possible. First impressions matter, especially with email gatekeepers. When Is IP Warming Required in Pardot? You’ll need to warm your IP in several Pardot-specific scenarios: If any of these apply, you must initiate an IP warming process before sending at scale. Otherwise, you’re inviting deliverability disasters. Before You Begin: Technical Prerequisites Before your first warm-up email goes out, your sending domain must be fully authenticated. These configurations signal to ISPs that your domain is legitimate: All three must be properly configured in your domain’s DNS records. Additionally, ensure that your sending domain is verified in Pardot through Salesforce’s setup tools. Lack of authentication can derail your IP warming before it even begins. Audience Preparation: Segmenting Strategically Success in IP warming hinges on who you email first. Start with your most engaged contacts—the ones who’ve recently opened or clicked. This signals to ISPs that your emails are wanted. It accelerates the trust-building process. Use Pardot segmentation rules, automation, and list filters to build out: Avoid including unverified, cold, or low-activity contacts at this stage. The goal is to send to recipients who will respond positively. List Hygiene: Clean Before You Send A clean list is essential. Even if engagement is high, bad data can poison your reputation. Purge: Use Pardot’s dynamic lists, automation rules, or connected Salesforce fields to build refined audiences. Good data equals good reputation. Designing an IP Warming Calendar Every warming strategy needs a defined calendar—a structured, progressive ramp-up of send volume over time. There’s no one-size-fits-all, but most experts recommend a 4 to 6-week warm-up period depending on your total list size. Start small. Increase volume incrementally. Focus first on quality, then scale. The calendar should define: Stick to the plan. One bad batch can undo a week of good sending. Sample 6-Week IP Warm-Up Plan Week Daily Volume Target Segment Week 1 3,000–5,000 Recent openers/clickers (30 days) Week 2 8,000–10,000 Actives in last 60 days Week 3 15,000 Mid-engagement contacts (90 days) Week 4 20,000–25,000 Broader audience (minus dormants) Week 5 30,000 Full segments with tiered re-engagers Week 6+ Full sending volume Production-ready lists and campaigns This framework can be adapted based on your unique audience and goals. Crafting Emails for Maximum Deliverability Even perfectly timed sends will fail if your content screams “spam.” Best practices: These small details play a huge role in whether your email is delivered—or discarded. Best Practices for Send Timing Timing can impact deliverability more than you’d expect. Follow these best practices: Consistency signals legitimacy. Random timing mimics spam behavior. Behavioral Metrics to Watch Closely Monitor these KPIs daily during warm-up: Use these metrics to evaluate whether your pace or audience needs adjusting. A sharp drop in opens or rise in complaints is an urgent warning sign. Using Pardot’s Reporting to Monitor Health Pardot offers robust tools for tracking warm-up progress: Export data regularly. Build a tracking dashboard if possible. Patterns will inform your next moves. Bounce Management in Pardot Understanding and managing bounces is key to success. Too many bounces—even soft—can flag your IP as risky. Remove repeat offenders. Avoiding Blacklists and Throttling Check public blacklists weekly. Use tools like: If you land on a blacklist, pause sending. Work to resolve the issue—typically by submitting a removal request and reviewing your sending practices. Pardot also allows throttling—limiting how many emails go out per hour. Enable this to prevent volume
3 Reasons why you should be using Pardot

Discover why Pardot (Marketing Cloud Account Engagement) is the go-to platform for B2B marketing automation. Learn how it streamlines lead management, enables data-driven campaigns, and aligns sales and marketing for scalable growth. Introduction Marketing today isn’t about one-size-fits-all emails or loosely segmented lists. It’s about relevance, timing, and orchestration—at scale. For B2B companies, managing that complexity without losing personalization is a perpetual challenge. That’s where Pardot, Salesforce’s marketing automation platform, delivers game-changing value. Purpose-built for B2B, MCAE turns fragmented campaigns into seamless buyer journeys and delivers measurable impact across your funnel. Reason 1: Streamlined Lead Management at Scale Capture Leads from Every Digital Touchpoint Whether it’s your website, paid ads, webinars, or downloadable content, MCAE lets you capture prospects at every stage of the customer journey. It offers embeddable forms, progressive profiling, and native landing pages to collect rich data without friction. Lead capture becomes a strategic asset—not just a technical function. Intelligent Lead Qualification Through Scoring and Grading Pardot’s lead scoring and grading system allows marketers to separate the curious from the committed. Scoring evaluates prospect behavior—what they do, click, and download—while grading evaluates how closely they match your ideal customer profile. Together, these dimensions prioritize sales-ready leads and reduce waste. Automated Nurturing via Engagement Studio Pardot’s Engagement Studio empowers you to design automated nurture flows that adapt to behavior in real time. Want to send one email to someone who downloaded a whitepaper and another to someone who clicked a pricing link? Done. You can build branching paths based on triggers, actions, and rules—without writing a line of code. Lead Segmentation and Dynamic Lists for Precision Targeting No more static spreadsheets or batch-and-blast campaigns. Pardot’s dynamic lists update in real time based on behavior and profile data. You can segment leads by geography, job title, funnel stage, or engagement level—allowing you to personalize at scale without micromanaging lists. Syncing Seamlessly with Salesforce CRM Because MCAE is a native Salesforce product, lead data syncs effortlessly between marketing and sales. Fields, campaigns, tasks, and activities flow bi-directionally. No connectors. No clunky integrations. Just real-time visibility into every prospect’s journey, straight from the Salesforce interface. Reason 2: Data-Driven Marketing Automation Creating Personalized Journeys Based on Behavior and Intent MCAE makes it easy to send the right message at the right time based on how prospects behave. Visited a pricing page? Trigger a follow-up email. Attended a webinar? Add them to a new drip campaign. By mapping content to intent signals, you increase conversion without manual outreach. Responsive Campaigns Powered by Real-Time Prospect Activity Unlike batch systems, Pardot processes engagement signals in real time. Whether it’s a form submission or email click, the platform responds immediately—adjusting automation, triggering alerts, or altering score values. You’re not reacting days later; you’re adapting as behavior unfolds. Deep Reporting on Email, Form, and Landing Page Performance Data is only powerful when it’s accessible. Pardot gives you in-depth reporting on email opens, click-through rates, form conversions, landing page performance, and campaign ROI. These insights allow you to fine-tune every touchpoint with precision. A/B Testing and Optimization Tools for Higher ROI Not sure which subject line will perform better? Want to test whether long-form or short-form content converts better? Pardot’s built-in A/B testing tools let you experiment and scale only what works. Optimization becomes iterative and evidence-based—not guesswork. Campaign Influence and Multi-Touch Attribution Pardot integrates with Salesforce Campaigns to support first-touch, last-touch, and multi-touch attribution. This allows marketers to demonstrate real impact on pipeline—not just vanity metrics. It closes the loop on marketing performance and helps justify budget allocations. Reason 3: Sales and Marketing Alignment Like Never Before Real-Time Prospect Activity Tracking for Sales Teams Sales reps can view prospect activities—email opens, page views, form completions—right inside Salesforce. This context helps reps understand a lead’s interest level before making contact, leading to smarter outreach and better conversion. Connected Campaigns That Unify Efforts Across Departments With connected campaigns, both sales and marketing work from the same playbook. Marketers track influence, while sales track revenue. Every touchpoint is logged in one place. This not only aligns goals but also builds accountability. Custom Alerts and Notifications for Sales Follow-Ups Pardot allows you to trigger real-time alerts when high-value leads take important actions. Whether it’s a visit to the pricing page or a webinar sign-up, reps can be notified instantly via email or Salesforce task creation—so no opportunity is missed. Advanced Segmentation to Feed Sales with the Right Leads Pardot allows advanced filtering by lead score, grade, industry, role, or behavior. This means sales gets a curated list of leads most likely to convert—boosting productivity and reducing time wasted on low-fit prospects. Closed-Loop Reporting to Refine Strategy Because Pardot and Salesforce work as one, marketers get visibility into which leads close, how long they took, and what influenced the decision. This creates a feedback loop that sharpens future campaigns and informs messaging across the board. Beyond the Basics: Additional Advantages of Pardot Enterprise-Grade Security and Compliance Pardot offers GDPR tools, field-level tracking opt-ins, IP restrictions, and secure data handling protocols. It’s built for enterprises that need marketing agility without compromising compliance. Scalable Architecture for Growing Businesses As your database grows, Pardot grows with you. From small teams sending monthly newsletters to enterprises running ABM campaigns across regions, Pardot’s infrastructure supports scale without performance compromise. Native Salesforce Integration Without Middleware No third-party tools. No custom connectors. Pardot is built on the Salesforce platform, enabling tighter integration, faster deployment, and cleaner data. Everything flows under a single data model. Support for ABM (Account-Based Marketing) Strategies With custom fields, segmentation, dynamic content, and Salesforce campaign mapping, Pardot supports ABM out of the box. It’s ideal for high-ticket B2B sales cycles that require coordinated, multi-channel engagement across decision-makers. Access to B2B Marketing Analytics and Einstein AI Use B2B Marketing Analytics for deeper insights into campaign influence and funnel performance. Layer Einstein AI on top to score leads intelligently, predict engagement, and personalize messaging automatically. Use Case: From MQL to Closed Deal in One Journey Imagine
Monitor Key Usage data for Your System
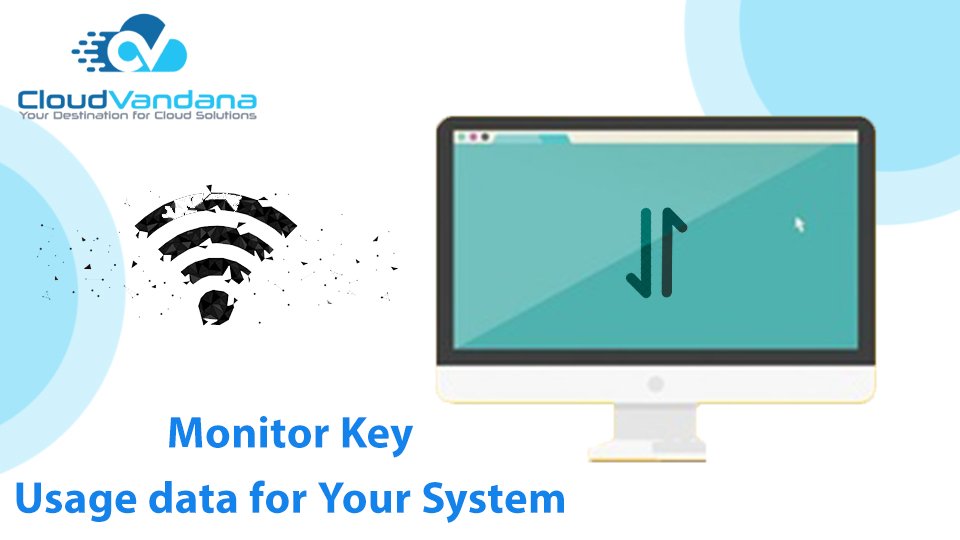
Learn how to monitor key usage data for your system to boost performance, detect issues early, and make data-driven decisions. Discover best practices, metrics, tools, and expert strategies. Table of Contents Introduction What Is Usage Data? Why Monitoring Usage Data Matters Operational Efficiency and Resource Allocation Proactive Problem Detection and Resolution Product Improvement Through Behavioral Analytics Strategic Decision-Making Driven by Real-World Usage Common Types of Usage Metrics to Monitor User Session Frequency and Duration Feature Utilization Trends System Load and Performance Bottlenecks Error Rates and Failure Patterns Licensing and Quota Tracking Behavioral Analytics and User Journeys Real-Time vs. Historical Monitoring Tools for Monitoring Usage Data KPIs and Benchmarks to Track Event Tracking and Instrumentation Alerts and Thresholds Usage Data and Capacity Planning Compliance and Privacy in Usage Monitoring Visualizing Usage Data Effectively Cross-Team Benefits of Usage Data Common Pitfalls and How to Avoid Them Success Stories: Monitoring in Action Integrating Usage Data with DevOps and ITSM Feedback Loops and Continuous Improvement Future Trends in Usage Monitoring Conclusion Get Strategic Insights with CloudVandana YOU MIGHT ALSO LIKE Introduction In a world increasingly reliant on software systems, understanding how those systems are used has become a business imperative. Monitoring key usage data is no longer a luxury reserved for DevOps teams—it’s the nerve center of system performance, user satisfaction, and product evolution. Without visibility, you’re navigating blind. What Is Usage Data? Usage data refers to the digital breadcrumbs users leave behind when they interact with a system. It’s the amalgam of actions, patterns, transactions, and behaviors that form a real-time map of how the system is consumed. This data can be structured (logins, feature clicks, API calls) or unstructured (logs, feedback, error messages). From user sessions to memory spikes, it all counts. Why Monitoring Usage Data Matters Operational Efficiency and Resource Allocation By tracking usage, teams can identify which services are under- or over-utilized. You avoid over-provisioning infrastructure or ignoring underperforming modules. Efficiency becomes measurable. Proactive Problem Detection and Resolution Monitoring catches anomalies before they become outages. When a sudden spike in failed login attempts or database query times emerges, your alerting system should respond before your users do. Product Improvement Through Behavioral Analytics Usage data reveals what features people actually use—not what you think they use. This data validates hypotheses, shapes roadmaps, and refines UI/UX flows based on empirical evidence. Strategic Decision-Making Driven by Real-World Usage Executives can make informed decisions when backed by usage trends. Whether it’s prioritizing integrations or investing in mobile-first design, the data doesn’t lie. Common Types of Usage Metrics to Monitor User Session Frequency and Duration Track how often users return and how long they stay. Frequent, long sessions indicate stickiness. Short, one-off logins might flag disengagement. Feature Utilization Trends Are your key features being ignored? Monitor button clicks, module accesses, and tool adoption over time to guide feature development. System Load and Performance Bottlenecks CPU, memory, bandwidth—monitor them all. These indicators highlight where the system is strained and when to scale. Error Rates and Failure Patterns 5xx errors, failed API calls, form validation issues—these hidden failures degrade user trust and must be surfaced in real time. Licensing and Quota Tracking Track API limits, user entitlements, and storage usage. This data helps forecast renewals, upsells, or usage abuse. Behavioral Analytics and User Journeys Understanding not just what users do but how they move through your system gives unparalleled insight. Heatmaps, funnel tracking, and path analysis illuminate behavior patterns that static analytics miss. Spot where users drop off, repeat actions, or fail to complete tasks. These friction points offer your highest ROI opportunities. Real-Time vs. Historical Monitoring Real-time monitoring is essential for live issues—think downtime, spikes, or security anomalies. Historical monitoring helps detect trends and seasonal patterns. Use real-time to react. Use history to predict. Tools for Monitoring Usage Data Popular tools include: Choose tools that align with your tech stack and business objectives. KPIs and Benchmarks to Track Every system has its critical KPIs: Benchmark against past performance and industry peers. Event Tracking and Instrumentation Design your system to emit meaningful events. Log not just errors, but successes, time-on-task, and conditional behavior. Structure events with context: user ID, timestamp, browser, API version. This detail transforms logs into intelligence. Alerts and Thresholds Set smart thresholds for alerts—not just static limits, but dynamic, behavior-driven triggers. Use severity levels: critical, warning, info. Avoid alert fatigue by tuning precision. An over-alerting system gets ignored. Usage Data and Capacity Planning Usage trends inform when to scale servers, upgrade databases, or adopt cloud elasticity. Capacity is no longer guesswork—it’s modeled on actual usage curves. Compliance and Privacy in Usage Monitoring Collect only what’s necessary. Anonymize where possible. Respect consent. Stay compliant with: Your data strategy should balance insight with integrity. Visualizing Usage Data Effectively Raw numbers are noise. Dashboards transform metrics into meaning. Use: Make your insights human-readable. Cross-Team Benefits of Usage Data One dataset, many interpretations. Common Pitfalls and How to Avoid Them Be intentional. Be analytical. Success Stories: Monitoring in Action One fintech company noticed a 40% increase in failed API calls on Mondays. Investigation revealed a billing batch process overloading memory—something they couldn’t have discovered without usage tracking. Another SaaS firm found that their most clicked feature was buried in a submenu. Repositioning it to the dashboard increased user engagement by 30%. Integrating Usage Data with DevOps and ITSM Feed logs and alerts into systems like Jira, ServiceNow, or PagerDuty. Use CI/CD tools like Jenkins or GitHub Actions to deploy based on real-time feedback loops. Usage data isn’t just for dashboards—it’s a workflow input. Feedback Loops and Continuous Improvement Usage monitoring is central to agile development. Sprint retrospectives fueled by data yield faster iteration and fewer assumptions. Usage data isn’t static—it should evolve as the product evolves. Future Trends in Usage Monitoring The monitoring of tomorrow is adaptive, not reactive. Conclusion Usage data is no longer just a backend concern—it’s the lifeblood of intelligent systems. Whether you’re chasing uptime, product-market fit, or user delight, monitoring key usage data
Complete Tasks in a Single Click
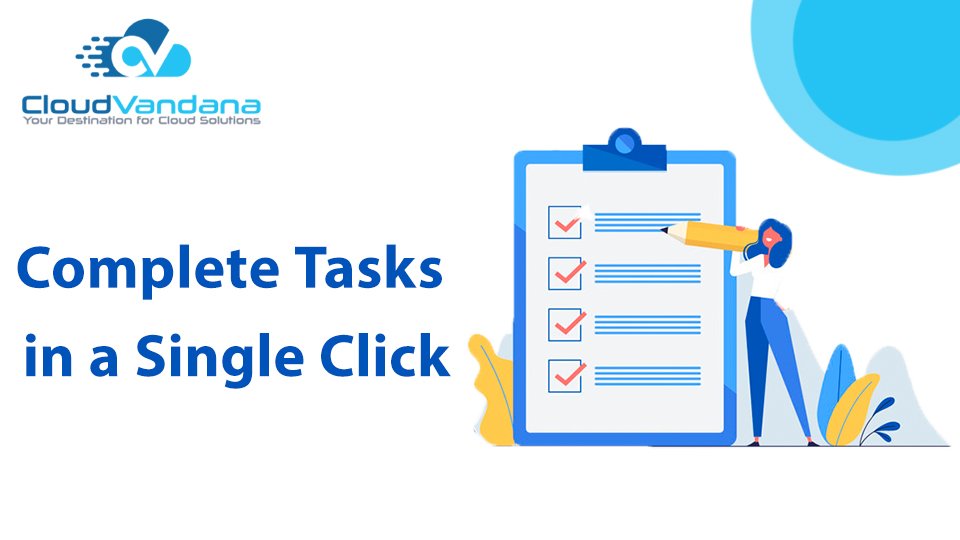
Learn how to complete tasks in a single click using automation, no-code tools, and integrated workflows. Explore real-world use cases that eliminate manual effort and accelerate business execution. Table of Contents 1. Introduction 2. The Era of One-Click Productivity 3. Why Task Completion Feels Cumbersome 4. Understanding Click Fatigue in the Modern Workflow 5. The Psychology Behind “One Click” Efficiency 6. From Multistep to Microactions: A Paradigm Shift 7. Business Impact of Streamlined Task Execution 8. Use Case 1: Marketing Approvals Pre-One-Click Workflow Post-One-Click Transformation 9. Use Case 2: Sales Pipeline Progression Common Bottlenecks One-Click Automation in CRM 10. Use Case 3: IT Helpdesk Management Manual Triage vs. One-Click Resolution 11. One Click Doesn’t Mean Oversimplified 12. How Automation Powers the Single Click 13. Integration: The Backbone of One-Click Solutions 14. Platform Spotlight: Salesforce Flow and Button-Triggered Actions 15. The Role of No-Code Tools in One-Click Design 16. Creating Safe Guardrails with One-Click Functions 17. Permissions, Auditing, and Compliance 18. Measuring ROI: Time Saved per Click 19. Visualizing the Impact with Before-and-After Metrics 20. Overcoming Skepticism and User Adoption 21. Best Practices for Designing One-Click Processes 22. Common Pitfalls and How to Avoid Them 23. Future of Task Completion: AI and Predictive One-Click Actions 26. Case Study: How a Team Cut 40% of Repetitive Work 27. Checklist: Are You Ready for One-Click Workflows? 28. Conclusion: A Click Toward the Future CloudVandana: Powering One-Click Workflows Across Salesforce YOU MIGHT ALSO LIKE 1. Introduction Work has never been more digital—or more demanding. Teams across industries toggle between dozens of tools, manage overlapping workflows, and execute hundreds of repetitive microtasks every week. Despite the surge in platforms claiming to boost productivity, the irony remains: completing a simple task can take multiple clicks, manual confirmations, and context switching. But what if it didn’t have to? What if a single, purposeful click could handle it all? 2. The Era of One-Click Productivity We’ve entered a new era of work, where agility and minimalism drive performance. The one-click productivity movement distills complex operations into streamlined triggers. It’s not just about convenience—it’s about collapsing bloated workflows into frictionless, intelligent processes. A click is no longer just an interaction—it’s an endpoint that sets into motion a cascade of logic, integration, and results. 3. Why Task Completion Feels Cumbersome Completing a task often involves an unintended obstacle course: searching for the right record, updating fields, sending follow-ups, attaching files, and logging outcomes. Individually, each step is tolerable. Collectively, they create decision drag. This isn’t inefficiency by accident—it’s a product of legacy systems, siloed data, and disconnected tools that prioritize form over function. 4. Understanding Click Fatigue in the Modern Workflow Click fatigue is an underestimated cognitive drain. It creeps in as users execute minor actions hundreds of times each day—approving items, assigning owners, updating statuses. Over time, this repetition doesn’t just waste time—it diminishes mental sharpness and contributes to digital burnout. Reducing the number of clicks isn’t cosmetic. It’s fundamental to restoring focus and efficiency. 5. The Psychology Behind “One Click” Efficiency One-click execution taps into behavioral psychology. The principle of “effort justification” suggests people value outcomes more when effort is reduced, not increased. When a user sees that a task can be completed with a single action, resistance drops. Momentum builds. The task gets done—immediately. It also creates positive reinforcement, conditioning users to trust their systems and rely on their workflows. 6. From Multistep to Microactions: A Paradigm Shift Historically, workflows mirrored the structure of teams. Separate steps meant distinct handoffs. But modern work requires something different—microactions. A microaction is a single gesture that triggers multiple backend activities. Instead of needing five actions to close a deal, update finance, and notify the team, one click initiates a synchronized chain reaction. 7. Business Impact of Streamlined Task Execution The average employee executes dozens of micro-decisions daily. Even shaving off 30 seconds per task across an organization results in hundreds of hours saved per month. That’s time reallocated to high-value thinking, customer focus, or innovation. Streamlined execution also lowers operational cost, accelerates time-to-decision, and improves morale by eliminating digital grunt work. 8. Use Case 1: Marketing Approvals Pre-One-Click Workflow Marketing teams often manage creative approvals manually: draft created → email sent → feedback collected → update version → repeat. This linear path not only delays campaigns but fosters versioning chaos. Post-One-Click Transformation With a single button labeled “Send for Review,” monday.com or Salesforce can trigger automated notifications, file sharing, approval requests, and feedback tracking—no manual coordination required. Campaigns move from concept to launch without stalling in an approval bottleneck. 9. Use Case 2: Sales Pipeline Progression Common Bottlenecks Sales representatives often spend more time updating records than engaging leads. Moving a deal from “Proposal Sent” to “Negotiation” can mean logging emails, updating close dates, creating follow-ups, and assigning tasks to finance. One-Click Automation in CRM Using one-click buttons in Salesforce or HubSpot, reps can advance stages, notify managers, assign tasks, and trigger proposal workflows simultaneously. No toggling. No friction. Just forward momentum. 10. Use Case 3: IT Helpdesk Management Manual Triage vs. One-Click Resolution Support teams face ticket fatigue. Each ticket demands triage, categorization, lookup, resolution, and communication. These steps create resolution lag and inconsistent service. With one-click macros or automation buttons, agents can resolve common issues—like password resets or access permissions—instantly. Backend logic executes scripts, notifies users, and closes tickets with audit-ready logs. 11. One Click Doesn’t Mean Oversimplified Critics argue that reducing work to one click means sacrificing complexity. This is a fallacy. One-click systems don’t remove complexity—they hide it behind intentional design. A one-click action can execute dozens of conditional operations under the hood. It’s simplification without compromise. 12. How Automation Powers the Single Click Automation is the mechanism that makes one-click functionality possible. Workflows configured in systems like Salesforce Flow, monday.com Automations, or Zapier connect multiple steps into a single logic train. Click a button, and the system: It’s not just automation. It’s orchestration. 13. Integration: The Backbone of One-Click Solutions One-click workflows thrive in
Sort Quote Line Items in Lightning Experience into Any Order
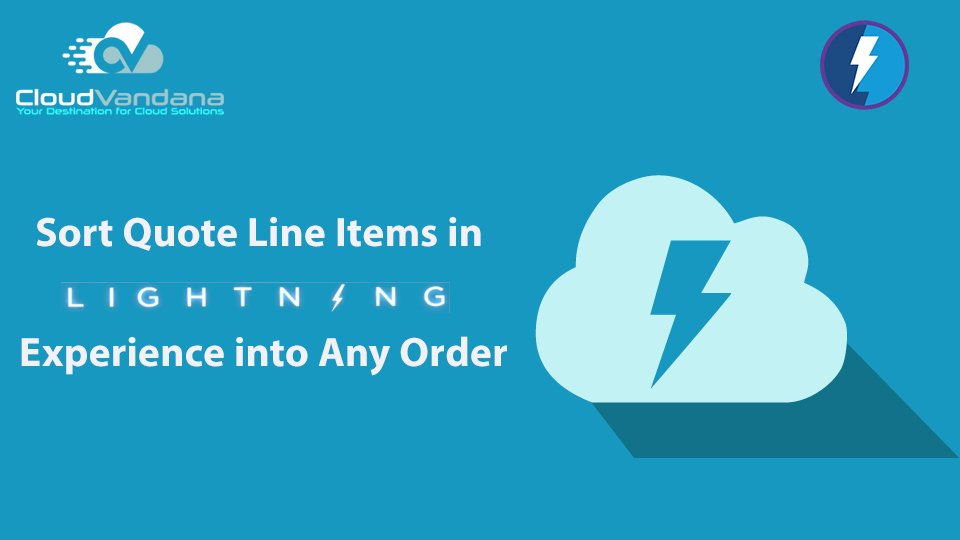
Learn how to sort quote line items in Salesforce Lightning Experience into any order. Explore custom fields, flows, Lightning components, and CPQ solutions to optimize quote structure and improve sales efficiency. Table of Contents Introduction Why Quote Line Item Order Matters How Salesforce Lightning Handles Quote Line Items by Default Challenges with Static Sorting Real-World Impacts of Rigid Sorting Common Use Cases for Custom Sorting Sorting Options in Lightning: What’s Possible Manual Reordering Using the SortOrder Field Introducing a Custom “Display Order” Field Building a Guided Flow for Reordering Creating a Lightning Web Component for Drag-and-Drop Salesforce CPQ: Native Support for Flexible Sorting Sorting With Product Bundles Updating PDF Templates to Reflect Custom Sorting Error Prevention With Validation Rules Security and Access Controls Reporting on Sorting Health AppExchange Tools That Streamline Sorting Developer Tips for Reusable Logic Best Practices for Admin Scalability Training Sales Teams for Adoption A Real-World Example Are You Ready for Custom Sorting? Future-Forward: AI-Optimized Quote Sequencing CloudVandana: Your Partner for Smarter Quote Customization YOU MIGHT ALSO LIKE Introduction The quoting process is more than just listing products—it’s a structured communication tool that guides decision-makers. The way you sequence line items on a quote can shape a client’s perception, prioritize offerings, and drive the close. In Salesforce Lightning Experience, however, organizing quote line items into a custom order isn’t as simple as it should be. Native functionality limits user control, demanding custom solutions to meet business needs. For teams relying on precision and professionalism, overcoming this limitation is critical. This article explores how to implement flexible, intelligent sorting of quote line items in Lightning Experience—without compromising speed, usability, or accuracy. Why Quote Line Item Order Matters Quotes are strategic assets. The order of line items helps shape the story you’re telling: leading with premium offerings, grouping bundled services, or following compliance-mandated formatting. Poor sequencing can confuse stakeholders, slow approvals, and even derail deals. More than aesthetic, the structure influences clarity, trust, and revenue outcomes. How Salesforce Lightning Handles Quote Line Items by Default In Lightning Experience, quote line items are displayed based on system-generated values—typically the order in which they were created. Salesforce uses the SortOrder field behind the scenes, but there’s no native user interface to control this field dynamically. This constraint makes it difficult for sales teams to rearrange items after quote creation. Challenges with Static Sorting Reps can’t easily reorder products or services once they’re added. Without a drag-and-drop interface or a declarative way to manage sorting, adjustments require: This not only creates friction—it discourages reps from tailoring quotes to the customer narrative. Real-World Impacts of Rigid Sorting Sales reps frequently express frustration when they can’t group related products, highlight flagship offerings first, or sequence items according to client requirements. Internally, it creates a reliance on technical teams for minor changes. Externally, clients receive quotes that appear jumbled or out of sync with discussions. In industries where order matters—like construction, healthcare, and IT services—this becomes a dealbreaker. Common Use Cases for Custom Sorting Custom sorting isn’t just a nice-to-have—it’s mission critical in many scenarios: Sorting Options in Lightning: What’s Possible Although Lightning doesn’t offer built-in drag-and-drop sorting, several technical and semi-technical solutions exist: The right approach depends on your org’s maturity, team size, and resources. Manual Reordering Using the SortOrder Field Every Quote Line Item has a SortOrder field. By adjusting these numbers (e.g., 10, 20, 30), users can control sequence. This approach: While straightforward, it’s best suited for small teams or low-frequency quoting. Introducing a Custom “Display Order” Field Admins can create a new field—commonly called “Display Order”—to drive sort logic across UIs, reports, and PDFs. It: This method also integrates easily into Flows and templates. Building a Guided Flow for Reordering Flows can be used to capture user input and apply order dynamically: Flows bridge the gap between user-friendly and system-safe. Creating a Lightning Web Component for Drag-and-Drop For more interactive control, consider building an LWC: This solution delivers an intuitive UI while preserving data structure and logic integrity. Salesforce CPQ: Native Support for Flexible Sorting Salesforce CPQ provides: If your org has CPQ, leverage its native capabilities before building from scratch. Sorting With Product Bundles Custom sorting must respect bundle logic: In CPQ, this behavior is managed automatically. In custom builds, use validation rules or Apex logic to maintain consistency. Updating PDF Templates to Reflect Custom Sorting Quotes generated via PDF must match what’s seen in Salesforce. This requires: Failure to align UI and output creates confusion for clients. Error Prevention With Validation Rules Avoid sorting mishaps by implementing validation rules to: Well-placed rules reduce support tickets and protect data quality. Security and Access Controls Not everyone should be allowed to edit sort order. Use: These controls maintain accountability across teams. Reporting on Sorting Health Create custom reports to monitor: Dashboards help managers track quote hygiene at scale. AppExchange Tools That Streamline Sorting Several third-party tools offer plug-and-play functionality for quote line item sorting: These tools reduce development time and expand functionality. Developer Tips for Reusable Logic When building your own solution: Good architecture now prevents tech debt later. Best Practices for Admin Scalability Admins should: A well-governed system supports scale and sustainability. Training Sales Teams for Adoption Even the best sorting system fails without adoption. Offer: When reps understand how sorting supports their deals, usage increases organically. A Real-World Example A mid-market IT firm implemented a custom sort solution using LWCs and Flow. After training, quote creation time dropped by 35%. Fewer errors meant less revision. Sales cycle duration decreased by 12 days on average. It wasn’t just technical improvement—it was commercial transformation. Are You Ready for Custom Sorting? Run this quick readiness check: If so, it’s time to upgrade how you sort quote line items. Future-Forward: AI-Optimized Quote Sequencing The future lies in intelligent sequencing. AI can analyze: With this insight, Salesforce could one day suggest the ideal line item order automatically—turning quotes into data-informed assets that drive higher conversions. CloudVandana: Your Partner for Smarter Quote Customization At
Customize Lightning Record Pages for the Phone
Lightning record pages are no longer limited to Lightning Experience on the desktop! You can experience the same record pages on the desktop and the mobile app. Salesforce allows you to go one step further, and based on the need of the users, you can assign one custom record page for desktop users and another for mobile app users. Lightning Record Pages To make record pages more dynamic, You can also set the particular component visibility based on the device it’s viewed on. Hence, You can show different sets of components on the same Lightning record page for phone users and desktop users. Steps: From the component’s properties pane, click Add Filter, then click Device. Pages that you already have in your org support both form factors by default. With a few exceptions, the custom and standard components on those pages work seamlessly across desktop and mobile. For more assistance, contact CloudVandana. Request a Free Consultation YOU MIGHT ALSO LIKE


